
The final game of day 1 of Caledonian Revolution saw my Deathwatch take on Joel's Space Wolves.
Game 3 featured Secure and Control as the Eternal War mission (one main objective each) and Deadlock as the Maelstrom mission (6 cards, decreasing each turn). The deployment map was Search and Destroy.
My army consisted of:
Battalion Detachment
Watch Master- Guardian Spear (W)
Watch Captain- Jump Pack, Xenophase Blade, Bolt Pistol (W)
Kill Team 1- Sergeant with Power Sword, Black Shield with Power Sword, 3 Veterans, 2 Frag Cannons, Vanguard Veteran with Pair Lightning Claws, Deathwatch Biker with Teleport Homer (KT1)
Kill Team 2- 5 Veterans with 2 Frag Cannons and 2 Shotguns (KT2)
Kill Team 3- 5 Veterans with Meltagun, 3 Combi-meltas (KT3)
Kill Team 4- 5 Veterans with 5 Stalker Pattern Boltguns (KT4)
Kill Team 5- 5 Veterans, Terminator with Power Fist, Storm Bolter and Cyclone Missile Launcher (KT5)
Rhino- Storm Bolter (R1)
Rhino- Storm Bolter (R2)
5 Vanguard Veterans- 2 pairs Lightning Claws, 2 Heavy Thunder Hammers (VV)
4 Bikers- Teleport Homer, Power Axe, Power Maul, 2 Power Swords (DB1)
4 Bikers- Teleport Homer, Power Maul, 3 Power Swords (DB2)
Corvus Blackstar- Twin Assault Cannon, 2 Stormstrike Missiles, Hurricane Bolter, Auspex Array (CB)
6 Command Points
My Warlord was the Watch Master, who had the Legendary Fighter warlord trait.
Joel's army consisted of:
Vanguard Detachment
Logan Grimnar- Storm Bolter (L)
Arjac Rockfist (A)
10 Wolfguard Terminators- Terminator Leader, Power Fist, Power Maul, 8 Power Axes, 5 Combi-meltas, 5 Combi-plasmas (T1)
5 Wolfguard Terminators- Terminator Leader, 5 Power Axes, 5 Combi-meltas (T2)
5 Wolfguard Terminators- Terminator Leader, 5 Power Axes, 5 Combi-plasmas (T3)
Spearhead Detachment
Iron Priest- Thunderwolf, servo-arm, Tempest Hammer (IP)
3 Swiftclaws- Pack Leader (S)
Whirlwind (W)
Whirlwind (W)
Whirlwind (W)
5 Command Points
Joel's warlord was Logan, who had the Tenacious Survivor warlord trait. A lot of Terminators to have to face, a lot. Hopefully, my vengeance rounds could help me to deal with them as they arrived.
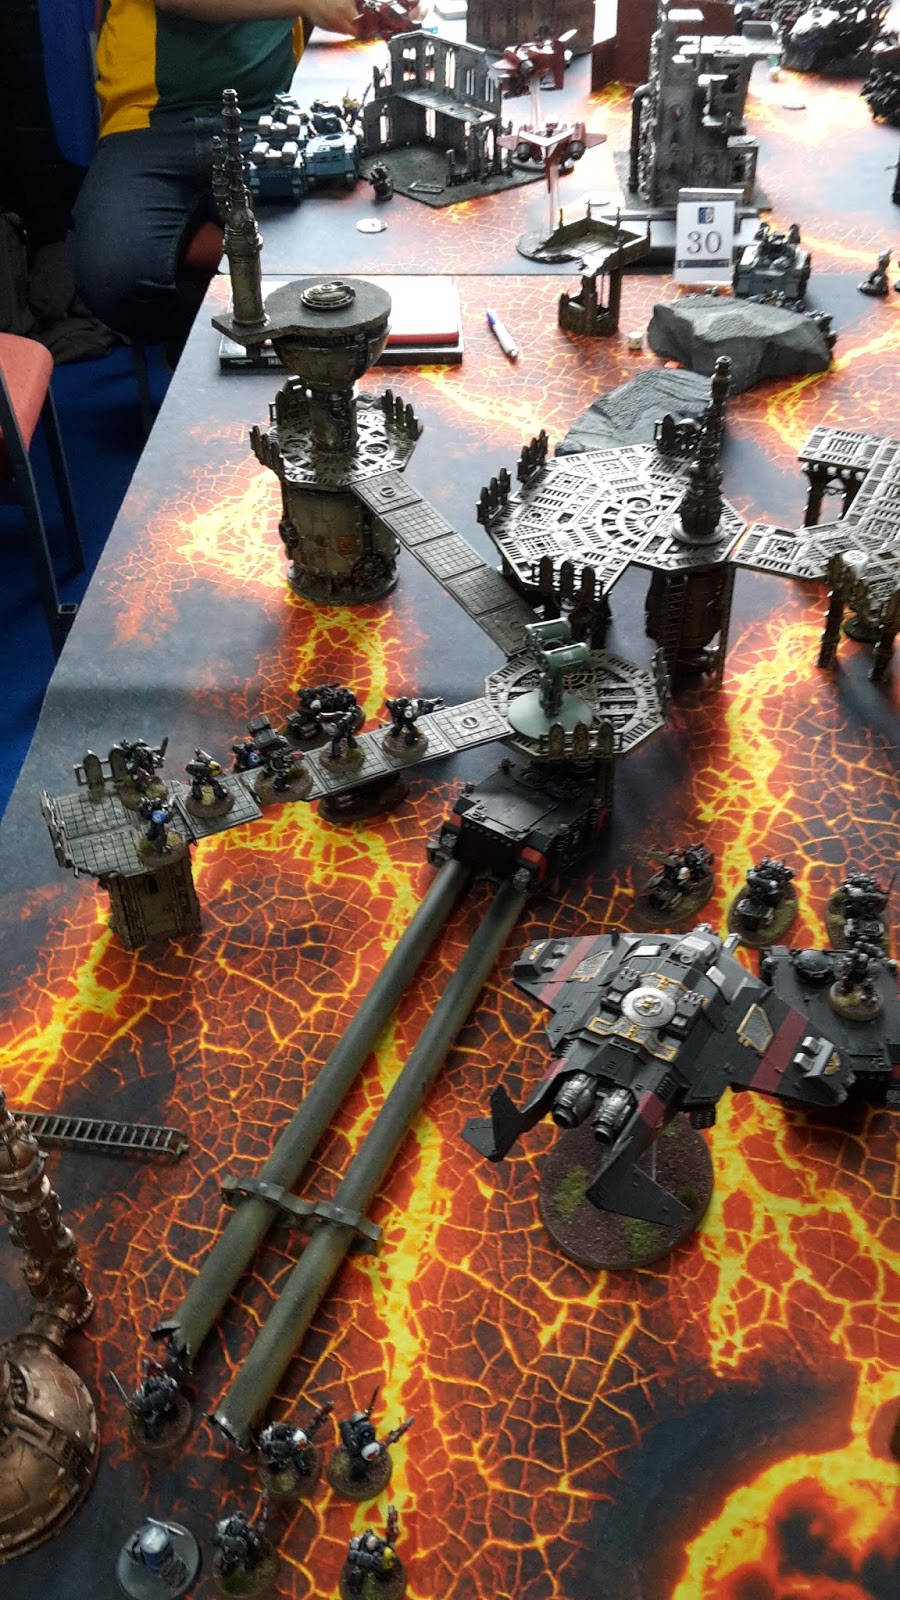
We rolled off for objectives and placed them as shown below:

Objective 1 was my main objective, while objective 2 was Joel's main objective. I won the roll off for deployment zone and chose the section with the walkway. The deployment order was:


TURN 1- DEATHWATCH
In turn 1, I drew Assassinate (kill an enemy character), Kingslayer (kill the enemy warlord), Mission Critical Objective- objective 3, Defend Objective 3, Defend Objective 6 and Secure Objective 6.

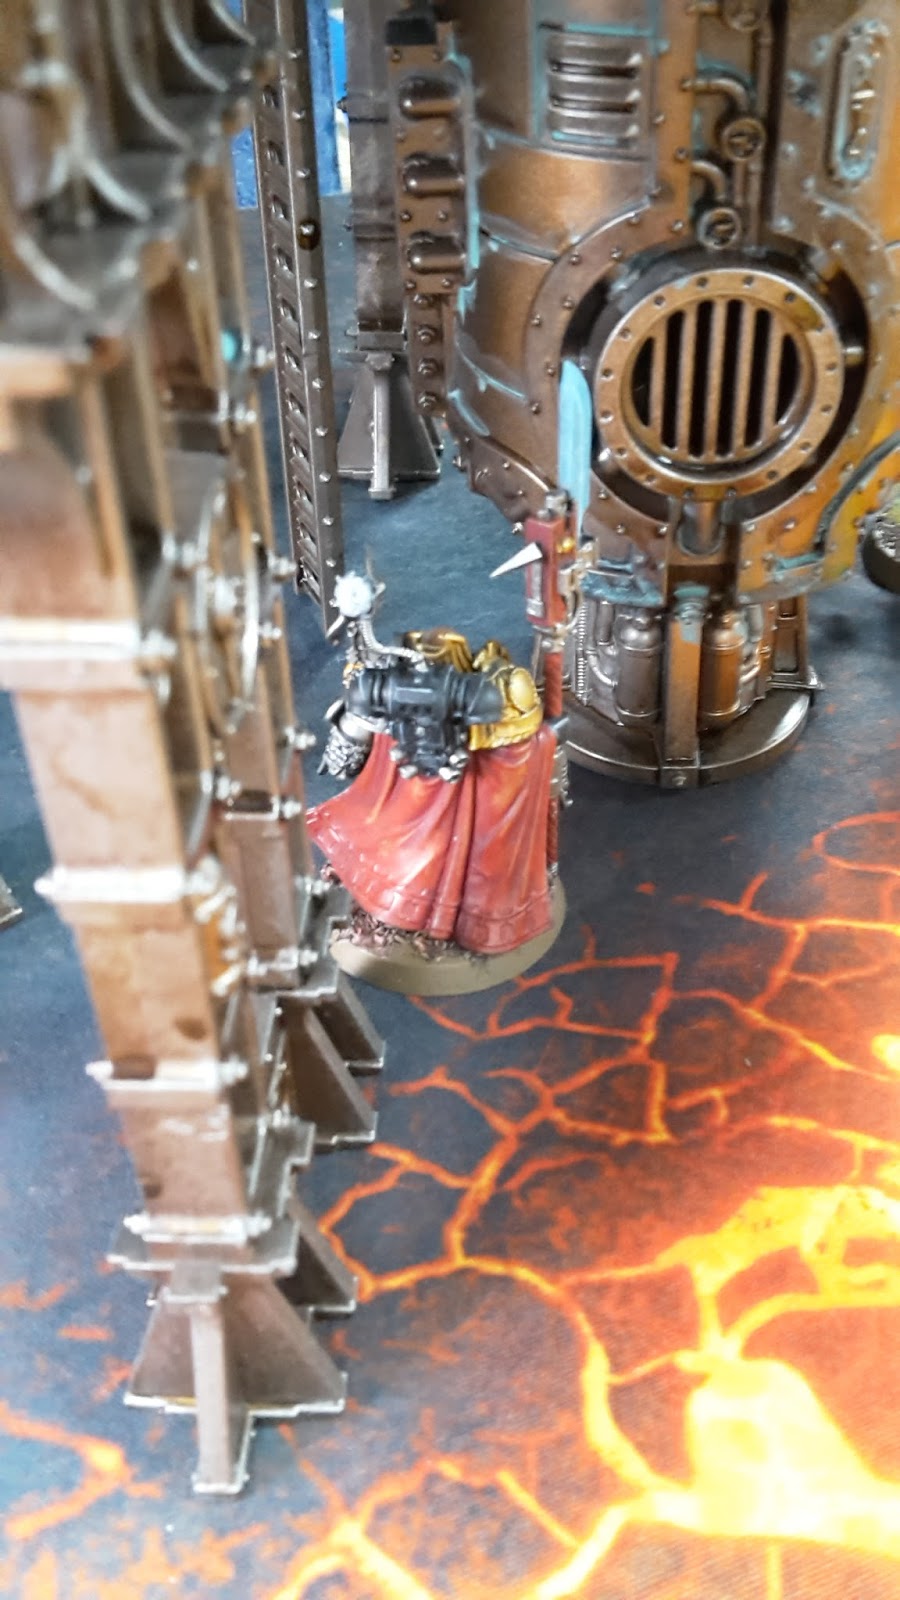
The Corvus Blackstar moved over the mining platform, closing in on the enemy forces, while the Bikers and Rhinos moved up to the cover of the platform. Kill Team 5 advanced to secure the objective in front of them.


The Terminator in the Kill Team fired his Cyclone Missile Launcher at the closest Whirlwind, hitting and wounding with one shot, but failing to get past the armour of the enemy vehicle. The two Bike squads opened fire with their Vengeance shells, taking two wounds from the vehicle with their combined firepower.
Finally, the Corvus Blackstar fired at the Whirlwind, taking four wounds from it with its weaponry.
At the end of my turn, I scored Mission Critical Objective and Secure Objective 6 for two points. I discarded Kingslayer.
TURN 1- SPACE WOLVES
In turn 1, Joel drew Assassinate, Kingslayer, Area Denial (have no enemy units in 6-12" of the centre), Defend Objective 2, Defend Objective 3 and Scour the Skies (kill an enemy flyer).

The area around the mining platform distorted, as the Wolfguard Terminators arrived en masse, moving into position north of the Deathwatch lines. The Swiftclaws gunned their engines, surging forward to meet the foe. The Iron Priest began working on the damaged Whirlwind, repairing two of its wounds.


In the shooting phase, the Wolfguard turned their combi-plasma weapons on the nearby Deathwatch Bikers, overcharging their shots and eliminating the squad (thanks to the re-rolls of Arjac and Logan, all the shots hit and wounded). One of the squad split their fire to aim at the Kill Team on the gantry, killing one of the squad.

The second Wolfguard unit aimed their combi-meltas at the Corvus Blackstar, hitting four times and wounding twice. The damage rolls totalled 7 wounds, but Joel used a Command Point re-roll and managed to strip 10 wounds from the Deathwatch flyer. One of the Whirlwinds fired at the flyer, hitting three times and wounding twice. I failed a single save and the flyer took 2 more wounds. A second Whirlwind fired at the Corvus Blackstar, hitting 3 times with its 7 shots and failing to cause any wounds.
The final Whirlwind fired at the second unit of Deathwatch Bikers, killing two of the squad.
The final unit of Terminators split their fire between the Rhino and the Corvus Blackstar. Four Meltaguns fired at the Deathwatch flyer, easily stripping its remaining wounds. One of the squad inside perished as they disembarked. A single combi-melta fired at the Rhino, taking 6 wounds from it. The Wolfguard fired their combi-plasmas at the Deathwatch Bikers and Kill Team 5, killing one from each squad.

Finally, the Swiftclaws fired at the disembarked Kill Team in the centre, killing one of the squad. They then launched an assault at the Rhino, wounding it once, but failing to get past the armour of the vehicle.
At the end of his turn, Joel scored Scour the Skies, two kill points and first blood.
VICTORY POINTS:
Deathwatch- 2 Maelstrom, 0 Kill Points
Space Wolves- 1 Maelstrom, 2 Kill Points
TURN 2- DEATHWATCH
This turn, I drew Secure Objective 6 and Secure Objective 3, I had Defend Objective 3, Defend Objective 6 and Assassinate from last turn. A good run of cards for me in turn 2.

The Meltagun Kill Team disembarked from their Rhino, moving up on the enemy vehicle. The Watch Master moved up to support them (and provide me with re-rolls). The other Kill Team disembarked from the Rhino in the centre, moving up to attack the Swiftclaws. The Deathwatch Bikers sped forward to join the Kill Team from the Corvus Blackstar to attack another Rhino.


I decided to keep Kill Teams 2 and 5 in position for this turn. They would most likely die in the following turn, but would score me valuable maelstrom points for objectives 3 and 6 at the end of this turn.
Kill Team 5 fired at the Terminator Squad in front of them. The Cyclone Missile Launcher failed to hit (in what was becoming a trend for the tournament). The Bolters from the squad managed to take down on of the Wolfguard Terminators with their Vengeance shells, Joel using a Command Point re-roll in vain to try and keep him alive. The Kill Team with the Stalker Bolters added their firepower, killing another of the Terminators.
Kill Team 3 fired their Meltaguns at the Whirlwind, wounding 3 times and easily blowing up the enemy vehicle. The resulting explosion managed to wound the Iron Priest twice and kill one of the Meltagun squad.
Nearby, Kill Team 2 fired their Frag Cannons at the Swiftclaws, getting 16 shots and 15 wounds after some great rolling (for once!). Joel failed 5 wounds and lost two Bikers. The rest of the squad fired their Bolters at the survivor, finishing him off in a hail of Bolter fire.

The final Kill Team fired solid shells from their Frag Cannons at the Whirlwind, wounding it four times. The rest of the squad and the nearby Bikers fired their Bolters at the vehicle, taking another 4 wounds from it.
The Kill Team and Bikers assaulted the Whirlwind. Overwatch fire from the vehicle killed one of the Kill Team. They struck at the Whirlwind, destroying it in combat. Both squads consolidated towards the Iron Priest, trying to increase the range between them and the Terminator's guns.

At the end of my turn, I scored Defend Objective 3, Defend Objective 6, Secure Objective 3 and Secure Objective 6. I also scored 3 kill points.
TURN 2- SPACE WOLVES
This turn, Joel had Assassinate, Kingslayer, Area Denial (have no enemy units in 6-12" of the centre), Defend Objective 2 and Defend Objective 3.

The Terminators advanced on the Deathwatch lines, walking in steady formation as their weapons spat death at the foe. The Iron Priest moved up to engage the Kill Team to his right.


The Whirlwind fired at the lone Biker, hitting and wounding three times, killing him outright. The Wolf Priest threw a grenade at the Kill Team in front of him, but failed to hit.
One Wolfguard Terminator Squad fired their Meltaguns at the Kill Team in the centre, easily wiping out the squad. The Terminator squad to the north fired their Plasma Guns at the Kill Team on the gantry, killing the entire squad.
The final Terminator squad split their fire between the central Rhino and Meltagun Kill Team. The Plasma fire succeeded in killing two of the Veterans. The squad's Meltaguns easily obliterated the Rhino, reducing the armoured hull to slag with their prolonged barrage.
The Iron Priest attempted to assault the Kill Team. The Veterans turned their Frag Cannons on the advanced Space Wolf, wounding him 10 times. Joel failed three saves, after using one of his re-rolls to keep the Priest alive. The rest of the squad hammered the Priest with their Bolters and succeeded in killing him off as he charged.

At the end of his turn, Joel scored Area Denial for 2 points and Defend Objective 2 for two points, as well as 4 kill points.
VICTORY POINTS:
Deathwatch- 8 Maelstrom, 4 Kill Points
Space Wolves- 5 Maelstrom, 6 Kill Points
At the end of turn 2, things were still close. My army had received a hammering, but a great turn 2 had seen me pull ahead on maelstrom points.
TURN 3- DEATHWATCH
This turn, I drew Area Denial, Secure Objective 4, No Prisoners (kill an enemy units) and had Assassinate from last turn.

The Vanguard Veterans arrived, landing to the South to support the Kill Team as they advanced on the Whirlwind. The Watch Captain also came in, landing on the platform besides Objective 4. The survivors of the Meltagun Kill Team and the Watch Master embarked in the Rhino, which moved quickly to the cover of the containers. My plan was to score as many maelstrom points as possible and try to survive to the end of the game. Hopefully, the slow moving Terminators would be unable to catch my forces.


The Kill Team fired their Frag Cannons at the Whirlwind, taking 8 wounds from it with their solid shells. Kill Team 4 fired their Stalker shells at the Terminators advancing on them. The high velocity Vengeance shells found the weaknesses in their armour, wounding the squad 3 times and killing one Terminator.
The Kill Team and Vanguard Veterans assaulted the Whirlwind, I had to use a re-roll to make sure the Vanguard Veterans made it in. The Vanguards struck, destroying the vehicle with their Heavy Thunder Hammers.


At the end of my turn, I scored Secure Objective 4, Area Denial and No Prisoners for 3 points. I discarded Assassinate, and also claimed a single kill point.
TURN 3- SPACE WOLVES
This turn, Joel drew Secure Objective 2 and had Defend Objective 3, Kingslayer and Assassinate.

The Wolfguard Terminators continued to move up on the Stalker Marines, supported by Arjac. One squad moved up on the retreating Rhino, while another moved to combat the Deathwatch surrounding the Space Wolves' objective.


In the shooting phase, the two units of Terminators fired at the Vanguard Veterans, killing one with their Meltaguns. They then fired their Plasma guns at the Kill Team, wiping out the unit.
The other Wolfguard unit fired at the Stalker Marines, but failed to do any damage.
In the charge phase, the Terminators assaulted the Vanguard Veterans, Joel having to use a Command Point re-roll to make the charge. The Space Wolves' elite easily tore apart the Deathwatch Veterans.

At the end of his turn, Joel scored Secure Objective 2 and 2 kill points.
VICTORY POINTS:
Deathwatch- 11 Maelstrom, 5 Kill Points
Space Wolves- 6 Maelstrom, 8 Kill Points
TURN 4- DEATHWATCH
This turn, I drew Priority Orders Received (secure Objective 5 with my warlord), Defend Objective 1 and Overwhelming Firepower.

The Rhino moved behind the cover of the containers, while the Watch Captain advanced to try and get into cover.


The Stalker Marines fired at the Terminators, killing another one with their Bolter fire.
At the end of my very quick turn, I scored no points.
TURN 4- SPACE WOLVES
This turn, Joel had Defend Objective 3, Kingslayer and Assassinate.

The Terminators and Arjac continued to move up on the Stalker Marines in my deployment zone, while another unit chased after the Watch Captain.
In the shooting phase, the Terminators fired their plasma guns at the Watch Captain, overcharging in the hope of killing him. The unit hit twice and wounded twice, taking four wounds from the Captain and leaving him on one.
The other squad fired at the Stalker Marines, killing two.
At the end of his turn, Joel also scored no points, a lucky break for me.
VICTORY POINTS:
Deathwatch- 11 Maelstrom, 5 Kill Points
Space Wolves- 6 Maelstrom, 8 Kill Points
TURN 5- DEATHWATCH
This turn, I had Priority Orders Received (secure Objective 5 with my warlord), Defend Objective 1 and Overwhelming Firepower.

The Watch Captain moved into the cover of the containers, while the Rhino moved up behind the barricade, the Watch Master disembarking to secure the objective.


The Kill Team fired on the advancing Terminators. For once, my rolling was on fire and all three remaining Terminators were slain by the Deathwatch Marines.
At the end of my turn, I scored Overwhelming Firepower, Defend Objective 1 and Priority Orders Received for 6 points and a kill point.
TURN 5- SPACE WOLVES
This turn, Joel had Defend Objective 3, Kingslayer and Assassinate.

Arjac moved up to engage the Kill Team on the objective. He assaulted the unit, suffering one wound in overwatch. He made the charge by 1", easily cutting down the rest of the squad.


At the end of his turn, Joel scored a single kill point.
VICTORY POINTS:
Deathwatch- 17 Maelstrom, 6 Kill Points
Space Wolves- 6 Maelstrom, 9 Kill Points
We rolled to see if the game ended and it did. Joel had managed to snatch my objective in the closing turn. The final scores were:
Deathwatch- 17 Maelstrom, 6 Kill Points, 0 objective points = 23 points
Space Wolves- 6 Maelstrom, 9 Kill Points, 6 objective points, First Blood and Linebreaker = 23 points
A drawn game.
AFTER-BATTLE THOUGHTS
Thanks to Joel for a great game, it was really tense right up till the end. I only noticed upon writing up that I should have been forced to discard one of my maelstrom cards on turn 5, as I could only have 2. This would have meant discarding Overwhelming Firepower and not being able to score it. As a result, Joel would have won by one points. Apologies to Joel for the error, neither of us picked it up during the game.
Annoyingly, had I got one more turn, I think I could have maybe won the game. I would have sent the Watch Master and Meltagun Kill Team to try and deal with Arjac. With some luck, I would have been able to kill him with either the Meltaguns or in combat and secured my objective. Unfortunately, we won't know how this would have turned out.
Overall, I think my plan worked out reasonably well. I got incredibly lucky with my maelstrom cards, as I seemed to draw exactly what I needed in most turns and was able to get a big score in that respect, which helped to keep me in the game. I think that sacrificing the two kill teams in turn 2 to score the 6 points was well worth it in hindsight.
Annoyingly, I would have liked to have got first blood, but without the Meltaguns, my army lacks the long range firepower to take out enemy vehicles.
I was particulary impressed with the Stalker Bolter unit in this game. Over the course of three turns they were able to eliminate a unit of Terminators with their firepower. True, Joel had some awful luck with his saves, but the Vengeance shells were great here, meaning he was saving on a 4+ only.
There was little I could do about the rest of the Terminators. Having so many combi-weapons in each squad meant that they were able to eliminate whatever they wanted to during the game. Arriving on turn 1 at short range was brutal. In addition, the re-rolls to hit and to wound from the combination of Logan and Arjac really increased their damage output and stops them from killing themselves with overheating plasma fire.
A pretty tough first day overall. I was on one win, one loss and one draw going into day 2. I would be interested to see how the rest of my games played out.
Joel's army consisted of:
Vanguard Detachment
Logan Grimnar- Storm Bolter (L)
Arjac Rockfist (A)
10 Wolfguard Terminators- Terminator Leader, Power Fist, Power Maul, 8 Power Axes, 5 Combi-meltas, 5 Combi-plasmas (T1)
5 Wolfguard Terminators- Terminator Leader, 5 Power Axes, 5 Combi-meltas (T2)
5 Wolfguard Terminators- Terminator Leader, 5 Power Axes, 5 Combi-plasmas (T3)
Spearhead Detachment
Iron Priest- Thunderwolf, servo-arm, Tempest Hammer (IP)
3 Swiftclaws- Pack Leader (S)
Whirlwind (W)
Whirlwind (W)
Whirlwind (W)
5 Command Points
Joel's warlord was Logan, who had the Tenacious Survivor warlord trait. A lot of Terminators to have to face, a lot. Hopefully, my vengeance rounds could help me to deal with them as they arrived.
We rolled off for objectives and placed them as shown below:

Objective 1 was my main objective, while objective 2 was Joel's main objective. I won the roll off for deployment zone and chose the section with the walkway. The deployment order was:
- Wolfguard Terminators (reserve)
- Vanguard Veterans (reserve)
- Wolfguard Terminators (reserve)
- Watch Captain (reserve)
- Wolfguard Terminators (reserve)
- Kill Team 5 (Cyclone Missile)
- Logan (reserve)
- Kill Team 4 (Stalkers)
- Arjac (reserve)
- Deathwatch Bikers
- Swiftclaws
- Deathwatch Bikers
- Whirlwind
- Rhino 1 (Meltagun squad)
- Whirlwind
- Rhino 2 (Frag Cannon squad)
- Whirlwind
- Corvus Blackstar
- Iron Priest
I deployed the Terminator Kill Team on the walkway, ready to use the Cyclone Missiles on the enemy vehicles. I put the Stalker kill team on my main objective. The rest of the army deployed far forward, ready to advance. I hoped to be able to deal with the Whirlwinds first, then try and take on the Terminators.


As I finished deploying first, I chose to go first. Joel failed to seize the initiative.
TURN 1- DEATHWATCH
In turn 1, I drew Assassinate (kill an enemy character), Kingslayer (kill the enemy warlord), Mission Critical Objective- objective 3, Defend Objective 3, Defend Objective 6 and Secure Objective 6.

The Corvus Blackstar moved over the mining platform, closing in on the enemy forces, while the Bikers and Rhinos moved up to the cover of the platform. Kill Team 5 advanced to secure the objective in front of them.


The Terminator in the Kill Team fired his Cyclone Missile Launcher at the closest Whirlwind, hitting and wounding with one shot, but failing to get past the armour of the enemy vehicle. The two Bike squads opened fire with their Vengeance shells, taking two wounds from the vehicle with their combined firepower.
Finally, the Corvus Blackstar fired at the Whirlwind, taking four wounds from it with its weaponry.
At the end of my turn, I scored Mission Critical Objective and Secure Objective 6 for two points. I discarded Kingslayer.
TURN 1- SPACE WOLVES
In turn 1, Joel drew Assassinate, Kingslayer, Area Denial (have no enemy units in 6-12" of the centre), Defend Objective 2, Defend Objective 3 and Scour the Skies (kill an enemy flyer).

The area around the mining platform distorted, as the Wolfguard Terminators arrived en masse, moving into position north of the Deathwatch lines. The Swiftclaws gunned their engines, surging forward to meet the foe. The Iron Priest began working on the damaged Whirlwind, repairing two of its wounds.


In the shooting phase, the Wolfguard turned their combi-plasma weapons on the nearby Deathwatch Bikers, overcharging their shots and eliminating the squad (thanks to the re-rolls of Arjac and Logan, all the shots hit and wounded). One of the squad split their fire to aim at the Kill Team on the gantry, killing one of the squad.

The second Wolfguard unit aimed their combi-meltas at the Corvus Blackstar, hitting four times and wounding twice. The damage rolls totalled 7 wounds, but Joel used a Command Point re-roll and managed to strip 10 wounds from the Deathwatch flyer. One of the Whirlwinds fired at the flyer, hitting three times and wounding twice. I failed a single save and the flyer took 2 more wounds. A second Whirlwind fired at the Corvus Blackstar, hitting 3 times with its 7 shots and failing to cause any wounds.
The final Whirlwind fired at the second unit of Deathwatch Bikers, killing two of the squad.
The final unit of Terminators split their fire between the Rhino and the Corvus Blackstar. Four Meltaguns fired at the Deathwatch flyer, easily stripping its remaining wounds. One of the squad inside perished as they disembarked. A single combi-melta fired at the Rhino, taking 6 wounds from it. The Wolfguard fired their combi-plasmas at the Deathwatch Bikers and Kill Team 5, killing one from each squad.

Finally, the Swiftclaws fired at the disembarked Kill Team in the centre, killing one of the squad. They then launched an assault at the Rhino, wounding it once, but failing to get past the armour of the vehicle.
At the end of his turn, Joel scored Scour the Skies, two kill points and first blood.
VICTORY POINTS:
Deathwatch- 2 Maelstrom, 0 Kill Points
Space Wolves- 1 Maelstrom, 2 Kill Points
TURN 2- DEATHWATCH
This turn, I drew Secure Objective 6 and Secure Objective 3, I had Defend Objective 3, Defend Objective 6 and Assassinate from last turn. A good run of cards for me in turn 2.

The Meltagun Kill Team disembarked from their Rhino, moving up on the enemy vehicle. The Watch Master moved up to support them (and provide me with re-rolls). The other Kill Team disembarked from the Rhino in the centre, moving up to attack the Swiftclaws. The Deathwatch Bikers sped forward to join the Kill Team from the Corvus Blackstar to attack another Rhino.


I decided to keep Kill Teams 2 and 5 in position for this turn. They would most likely die in the following turn, but would score me valuable maelstrom points for objectives 3 and 6 at the end of this turn.
Kill Team 5 fired at the Terminator Squad in front of them. The Cyclone Missile Launcher failed to hit (in what was becoming a trend for the tournament). The Bolters from the squad managed to take down on of the Wolfguard Terminators with their Vengeance shells, Joel using a Command Point re-roll in vain to try and keep him alive. The Kill Team with the Stalker Bolters added their firepower, killing another of the Terminators.
Kill Team 3 fired their Meltaguns at the Whirlwind, wounding 3 times and easily blowing up the enemy vehicle. The resulting explosion managed to wound the Iron Priest twice and kill one of the Meltagun squad.
Nearby, Kill Team 2 fired their Frag Cannons at the Swiftclaws, getting 16 shots and 15 wounds after some great rolling (for once!). Joel failed 5 wounds and lost two Bikers. The rest of the squad fired their Bolters at the survivor, finishing him off in a hail of Bolter fire.

The final Kill Team fired solid shells from their Frag Cannons at the Whirlwind, wounding it four times. The rest of the squad and the nearby Bikers fired their Bolters at the vehicle, taking another 4 wounds from it.
The Kill Team and Bikers assaulted the Whirlwind. Overwatch fire from the vehicle killed one of the Kill Team. They struck at the Whirlwind, destroying it in combat. Both squads consolidated towards the Iron Priest, trying to increase the range between them and the Terminator's guns.

At the end of my turn, I scored Defend Objective 3, Defend Objective 6, Secure Objective 3 and Secure Objective 6. I also scored 3 kill points.
TURN 2- SPACE WOLVES
This turn, Joel had Assassinate, Kingslayer, Area Denial (have no enemy units in 6-12" of the centre), Defend Objective 2 and Defend Objective 3.

The Terminators advanced on the Deathwatch lines, walking in steady formation as their weapons spat death at the foe. The Iron Priest moved up to engage the Kill Team to his right.


The Whirlwind fired at the lone Biker, hitting and wounding three times, killing him outright. The Wolf Priest threw a grenade at the Kill Team in front of him, but failed to hit.
One Wolfguard Terminator Squad fired their Meltaguns at the Kill Team in the centre, easily wiping out the squad. The Terminator squad to the north fired their Plasma Guns at the Kill Team on the gantry, killing the entire squad.
The final Terminator squad split their fire between the central Rhino and Meltagun Kill Team. The Plasma fire succeeded in killing two of the Veterans. The squad's Meltaguns easily obliterated the Rhino, reducing the armoured hull to slag with their prolonged barrage.
The Iron Priest attempted to assault the Kill Team. The Veterans turned their Frag Cannons on the advanced Space Wolf, wounding him 10 times. Joel failed three saves, after using one of his re-rolls to keep the Priest alive. The rest of the squad hammered the Priest with their Bolters and succeeded in killing him off as he charged.

At the end of his turn, Joel scored Area Denial for 2 points and Defend Objective 2 for two points, as well as 4 kill points.
VICTORY POINTS:
Deathwatch- 8 Maelstrom, 4 Kill Points
Space Wolves- 5 Maelstrom, 6 Kill Points
At the end of turn 2, things were still close. My army had received a hammering, but a great turn 2 had seen me pull ahead on maelstrom points.
TURN 3- DEATHWATCH
This turn, I drew Area Denial, Secure Objective 4, No Prisoners (kill an enemy units) and had Assassinate from last turn.

The Vanguard Veterans arrived, landing to the South to support the Kill Team as they advanced on the Whirlwind. The Watch Captain also came in, landing on the platform besides Objective 4. The survivors of the Meltagun Kill Team and the Watch Master embarked in the Rhino, which moved quickly to the cover of the containers. My plan was to score as many maelstrom points as possible and try to survive to the end of the game. Hopefully, the slow moving Terminators would be unable to catch my forces.


The Kill Team fired their Frag Cannons at the Whirlwind, taking 8 wounds from it with their solid shells. Kill Team 4 fired their Stalker shells at the Terminators advancing on them. The high velocity Vengeance shells found the weaknesses in their armour, wounding the squad 3 times and killing one Terminator.
The Kill Team and Vanguard Veterans assaulted the Whirlwind, I had to use a re-roll to make sure the Vanguard Veterans made it in. The Vanguards struck, destroying the vehicle with their Heavy Thunder Hammers.


At the end of my turn, I scored Secure Objective 4, Area Denial and No Prisoners for 3 points. I discarded Assassinate, and also claimed a single kill point.
TURN 3- SPACE WOLVES
This turn, Joel drew Secure Objective 2 and had Defend Objective 3, Kingslayer and Assassinate.

The Wolfguard Terminators continued to move up on the Stalker Marines, supported by Arjac. One squad moved up on the retreating Rhino, while another moved to combat the Deathwatch surrounding the Space Wolves' objective.


In the shooting phase, the two units of Terminators fired at the Vanguard Veterans, killing one with their Meltaguns. They then fired their Plasma guns at the Kill Team, wiping out the unit.
The other Wolfguard unit fired at the Stalker Marines, but failed to do any damage.
In the charge phase, the Terminators assaulted the Vanguard Veterans, Joel having to use a Command Point re-roll to make the charge. The Space Wolves' elite easily tore apart the Deathwatch Veterans.

At the end of his turn, Joel scored Secure Objective 2 and 2 kill points.
VICTORY POINTS:
Deathwatch- 11 Maelstrom, 5 Kill Points
Space Wolves- 6 Maelstrom, 8 Kill Points
TURN 4- DEATHWATCH
This turn, I drew Priority Orders Received (secure Objective 5 with my warlord), Defend Objective 1 and Overwhelming Firepower.

The Rhino moved behind the cover of the containers, while the Watch Captain advanced to try and get into cover.


The Stalker Marines fired at the Terminators, killing another one with their Bolter fire.
At the end of my very quick turn, I scored no points.
TURN 4- SPACE WOLVES
This turn, Joel had Defend Objective 3, Kingslayer and Assassinate.

The Terminators and Arjac continued to move up on the Stalker Marines in my deployment zone, while another unit chased after the Watch Captain.
In the shooting phase, the Terminators fired their plasma guns at the Watch Captain, overcharging in the hope of killing him. The unit hit twice and wounded twice, taking four wounds from the Captain and leaving him on one.
The other squad fired at the Stalker Marines, killing two.
At the end of his turn, Joel also scored no points, a lucky break for me.
VICTORY POINTS:
Deathwatch- 11 Maelstrom, 5 Kill Points
Space Wolves- 6 Maelstrom, 8 Kill Points
TURN 5- DEATHWATCH
This turn, I had Priority Orders Received (secure Objective 5 with my warlord), Defend Objective 1 and Overwhelming Firepower.

The Watch Captain moved into the cover of the containers, while the Rhino moved up behind the barricade, the Watch Master disembarking to secure the objective.


The Kill Team fired on the advancing Terminators. For once, my rolling was on fire and all three remaining Terminators were slain by the Deathwatch Marines.
At the end of my turn, I scored Overwhelming Firepower, Defend Objective 1 and Priority Orders Received for 6 points and a kill point.
TURN 5- SPACE WOLVES
This turn, Joel had Defend Objective 3, Kingslayer and Assassinate.

Arjac moved up to engage the Kill Team on the objective. He assaulted the unit, suffering one wound in overwatch. He made the charge by 1", easily cutting down the rest of the squad.


At the end of his turn, Joel scored a single kill point.
VICTORY POINTS:
Deathwatch- 17 Maelstrom, 6 Kill Points
Space Wolves- 6 Maelstrom, 9 Kill Points
We rolled to see if the game ended and it did. Joel had managed to snatch my objective in the closing turn. The final scores were:
Deathwatch- 17 Maelstrom, 6 Kill Points, 0 objective points = 23 points
Space Wolves- 6 Maelstrom, 9 Kill Points, 6 objective points, First Blood and Linebreaker = 23 points
 |
| End of the game. |
A drawn game.
AFTER-BATTLE THOUGHTS
Thanks to Joel for a great game, it was really tense right up till the end. I only noticed upon writing up that I should have been forced to discard one of my maelstrom cards on turn 5, as I could only have 2. This would have meant discarding Overwhelming Firepower and not being able to score it. As a result, Joel would have won by one points. Apologies to Joel for the error, neither of us picked it up during the game.
Annoyingly, had I got one more turn, I think I could have maybe won the game. I would have sent the Watch Master and Meltagun Kill Team to try and deal with Arjac. With some luck, I would have been able to kill him with either the Meltaguns or in combat and secured my objective. Unfortunately, we won't know how this would have turned out.
Overall, I think my plan worked out reasonably well. I got incredibly lucky with my maelstrom cards, as I seemed to draw exactly what I needed in most turns and was able to get a big score in that respect, which helped to keep me in the game. I think that sacrificing the two kill teams in turn 2 to score the 6 points was well worth it in hindsight.
Annoyingly, I would have liked to have got first blood, but without the Meltaguns, my army lacks the long range firepower to take out enemy vehicles.
I was particulary impressed with the Stalker Bolter unit in this game. Over the course of three turns they were able to eliminate a unit of Terminators with their firepower. True, Joel had some awful luck with his saves, but the Vengeance shells were great here, meaning he was saving on a 4+ only.
There was little I could do about the rest of the Terminators. Having so many combi-weapons in each squad meant that they were able to eliminate whatever they wanted to during the game. Arriving on turn 1 at short range was brutal. In addition, the re-rolls to hit and to wound from the combination of Logan and Arjac really increased their damage output and stops them from killing themselves with overheating plasma fire.
A pretty tough first day overall. I was on one win, one loss and one draw going into day 2. I would be interested to see how the rest of my games played out.
A quick one on the "Defend Objective" card... we had some debate about this at our club, and we have currently settled on this way of playing it, which is different to how you play it. To defend the objective, you hold it at the end of your turn, and the end of your opponents. This would leave your squad hanging in the wind for less time, able to move away from the advancing terminators sooner.
ReplyDeleteHere was the winning rationale for our current way of playing, over the method used in this game.
Rulebook Page 176 describes the game of being 5 or more Battle Rounds, each Battle Round comprising two player turns. No more confusion over player turn/game turn here I guess...
Rulebook page 228 - defend objective x - Score if you control at the end of two consecutive TURNS. With the definition of turns being PLAYER turns and a combination of two player turns now being a battle round, this would suggest that it is your turn and your opponents turn, score.
Finally, it was argued that you can't score objectives in your opponents turn... 7th ed hangover there I'm afraid...
Rulebook page 226 Achieving Tactical Objectives... "At the end of every turn (yours and your enemy's) you must check to see if you have achieved any of your tactical objectives."
Obviously a bit late for this game, but for future games, I can see it keeping your units static for less time. Could be useful for you. Although probably worth clarifying how that one is played at whatever event you're at/with your opponent. And of course, if there's something that proves me wrong on this one, do please let me know...
Actually, I think your way of playing it is the correct way. I think I confused the definition of turns and battle rounds, so that was where the problem occurred.
DeleteI also didn't know you could score cards in your opponent's turn. In several games, I'm sure there were cards I could have scored, certainly Assassinate in this game where I killed the Iron Priest with overwatch fire.
Thanks for the corrections!
That was always irritating in seventh... an ongoing combat kills the unit, you don't get to score Blood and Guts cos you didn't kill it in your turn. Happy to see that problem solved.
DeleteYeah, I was going to say. You definitely would have scored Assassinate there, which cancels out the Overwhelming Firepower you should have discarded and would have kept it at a draw.
DeleteWell played. I was not expecting you to be able to even pull a draw out of that as the Game was progressing.
Thanks WestRider. To be honest, I was expecting a pasting from the Terminators as well. I got very lucky with my maelstrom cards in this game, drawing some great combinations.
Delete