
This week's battle report sees my Deathwatch army take on Harry (AKA the Dark Artisan) and his Adeptus Mechanicus and Skitarii force.


This game was being filmed for his awesome Youtube channel, so was played on a fantastic board full of terrain against a great looking army. I think this is pretty neat, as you will get both the video battle report and written battle report to check out, as well as the perspective of both players on how the game went.
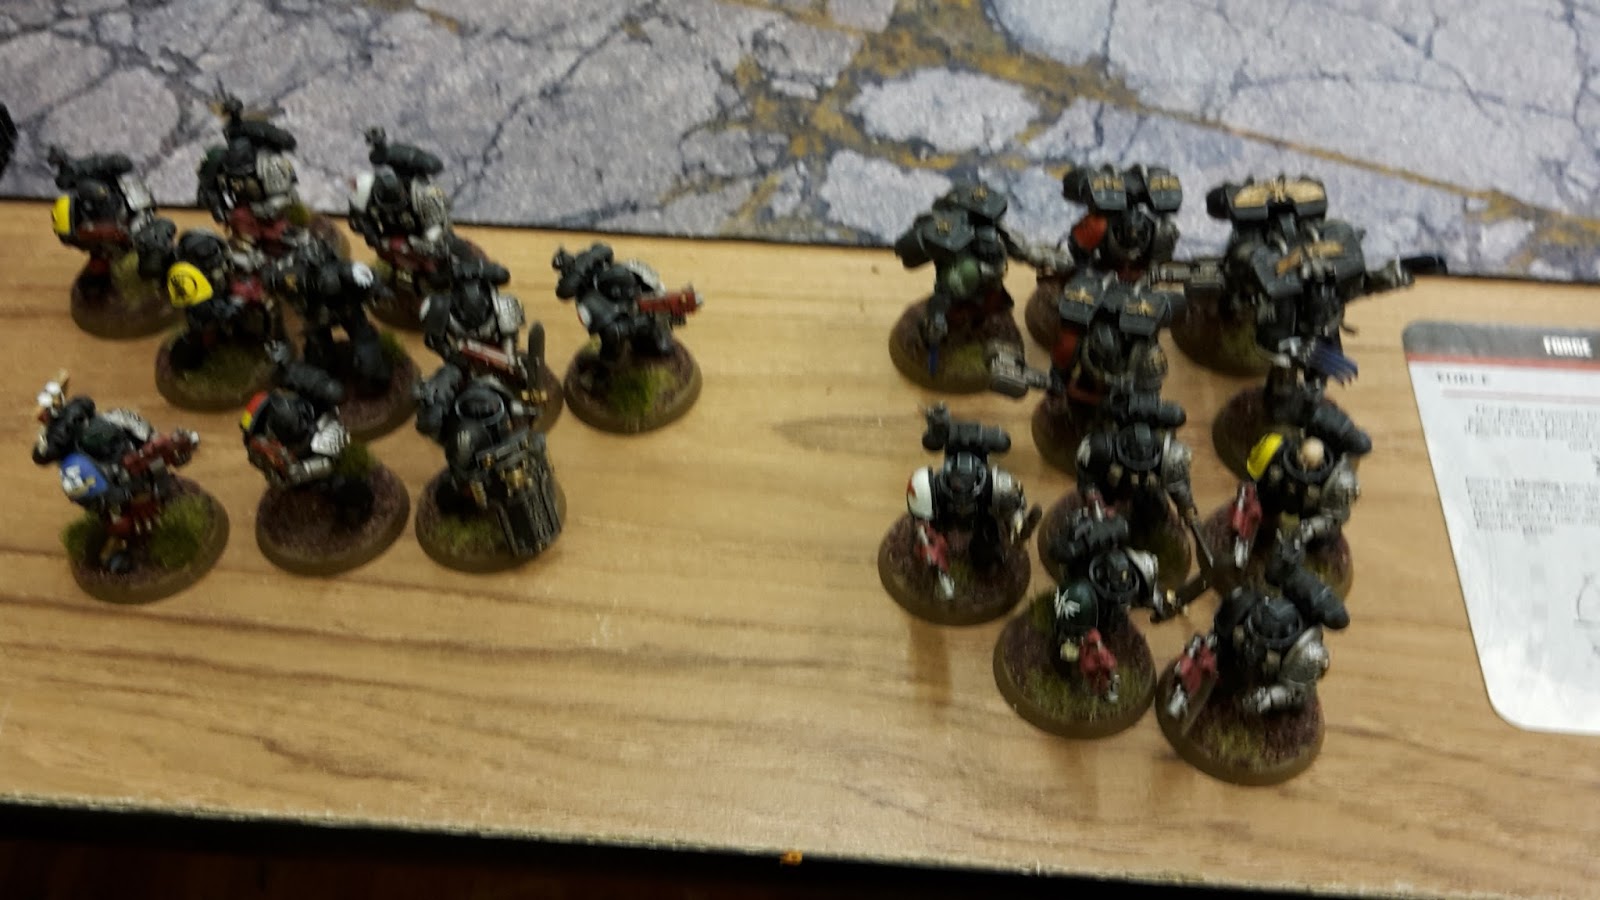
My army consisted of:
Combined Arms Detachment
Watch Captain Artemis (with V5)
Librarian- Mastery Level 2, Meltabombs (with V5)
10 Veterans- 4 Frag Cannons, Storm Shield, Auspex (V1 and V2)
Drop Pod (DP1)
10 Veterans- 2 Infernus Heavy Bolters (V3 and V4)
Rhino (R)
8 Veterans- 3 Deathwatch Shotguns, 2 Heavy Thunder Hammers, 2 Storm Shields (V5)
Drop Pod (DP2)
5 Veterans- 5 Stalker Pattern Boltguns (V6)
4 Bikers- 3 Power Swords, Power Axe, Meltabombs (B1)
4 Bikers- 3 Power Swords, Power Maul, Meltabombs (B2)
5 Vanguard Veterans- 3 pairs of Lightning Claws, 2 Heavy Thunder Hammers (VV)

My warlord was Artemis, his Warlord Trait allowing me to change Mission Tactics an additional time. My Librarian rolled on Biomancy and got Smite, Enfeeble and Warp Speed.
For my army, I stuck with a CAD. I was hoping to use the Blackspear Strike Force, but didn't have time to get my Corvus Blackstar painted to use it. Anyway, in most missions, a CAD is a solid choice thanks to Objective Secured.
I took Artemis to lead the force once again, hoping to use his Stasis Bomb to good effect. I backed him up with a Librarian using Biomancy. I was hoping to get Endurance to boost my durability, but ended up with Enfeeble and Warp Speed instead. Smite is a pretty good Primaris for me, as my army lacks a lot of AP2 shooting.
Both characters would join a unit of combat Veterans in a Drop Pod. I took three shotguns, two Heavy Thunder Hammers and a couple of Storm Shields for some added protection. I didn't really rate the Deathwatch Shotguns when I first reviewed the codex, but after using them for a few games, I have turned around on them. Even though the template mode is only S3, the number of hits you can normally get more than makes up for this in most games.
I took a unit of Veterans with 4 Frag Cannons in a Drop Pod. I decided to combat squad these and put two cannons in each unit, allowing me to go after 2 different targets. One squad would take the Storm Shield and Auspex (I would normally put them both on the squad Sergeant, but the recent FAQ put an end to that).
I then took a unit of Veteran with Stalker Boltguns and a unit with Infernus Heavy Bolters in a Rhino. The Stalker unit could hold a backfield objective, while the Rhino would give me more mobility to go after objectives.
To round off the list, I took my standard two units of 4 Bikers (power weapons and Meltabombs) and a unit of Vanguard Veterans armed for combat.
Harry's army consisted of:
Grand Convocation Detachment
Belisarius Cawl (with D)
Tech Priest Dominus- Artificer Armour, Eradication Ray, Macrostubber, Mechadendrite Harness, Power Axe, Refractor Field, Scryer Skull (with D)
3 Kataphron Breachers- Arc Claw, Heavy Arc Rifle (B)
3 Kataphron Destroyers- Heavy Grav-cannon, Phosphor Blaster (D)
6 Rangers- 2 Arc Rifles, Omnispex, Alpha with Arc Maul and Arc Pistol (R)
6 Vanguard- 2 Plasma Calivers, Omnispex, Vanguard Alpha (V1)
6 Vanguard- Plasma Caliver, Vanguard Alpha (V2)
5 Infiltrators- Princeps, Flechette Blasters and Taser Goads (I)
5 Ruststalkers- Princeps with Chordclaw, Refractor Field, Omniscient Mask (RS)
2 Sydonian Dragoons- Phosphor Serpenta, Taser Lance (SD)
3 Onager Dunecrawlers- Cognis Heavy Stubber, Neutron Laser, Cognis Heavy Stubber (OD)


Harry's warlord was Cawl, giving him a re-roll for his Feel No Pain roll.
We rolled for mission and got Capture and Control (up to 3 cards each turn). We set up the objectives as shown below:

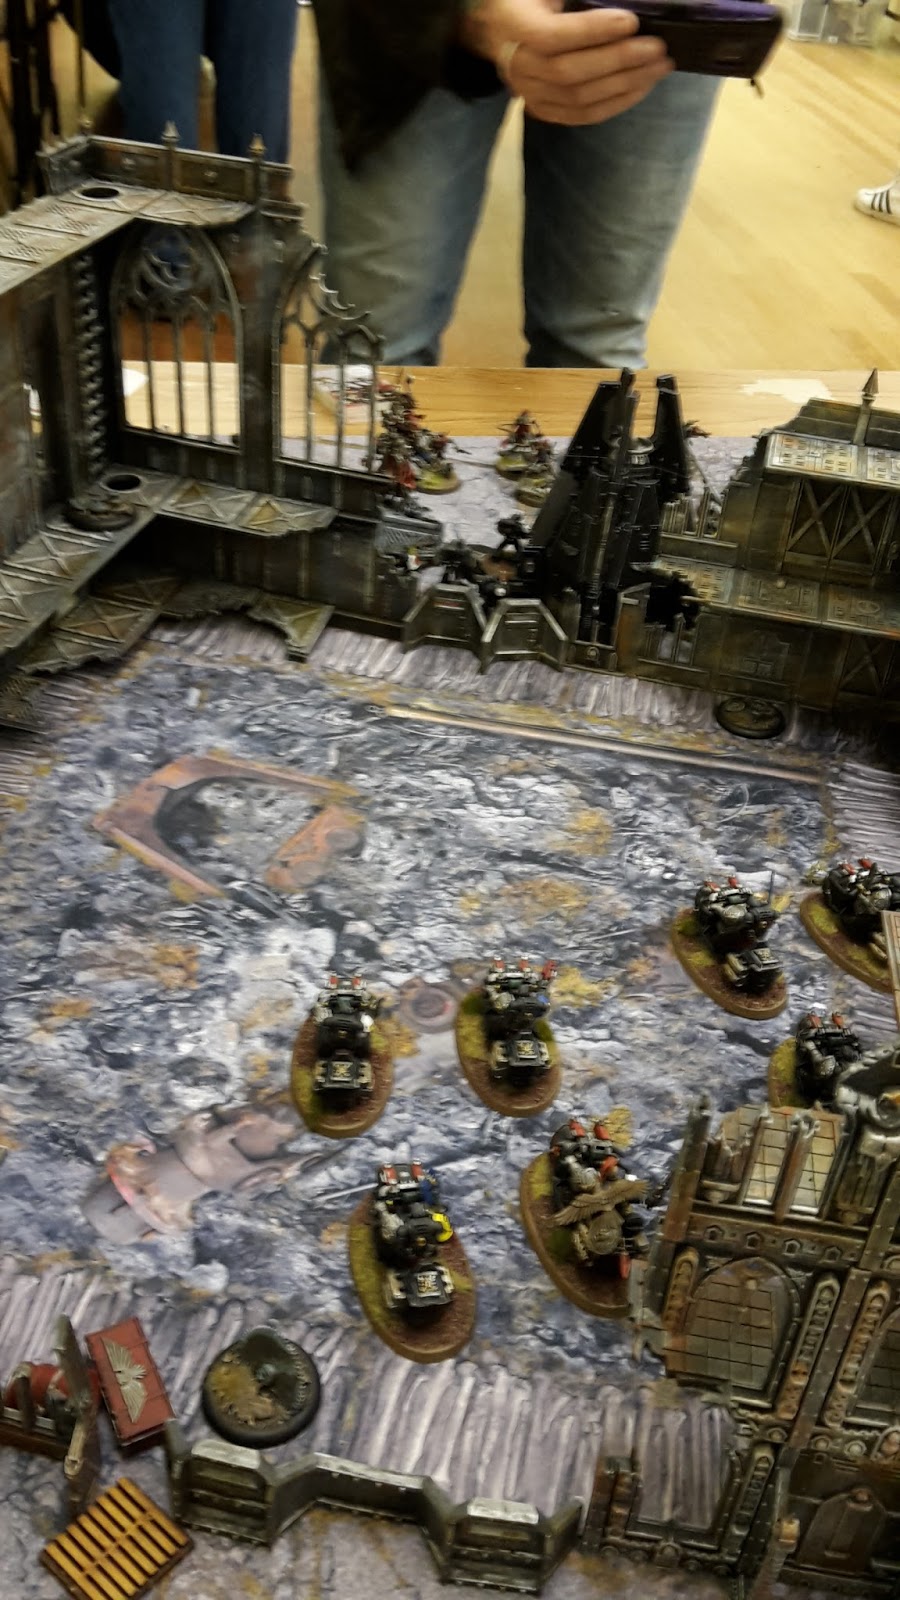
Harry won the roll for deployment and elected to go second. I set up the Stalker Boltgun unit in the ruins to the left, holding objective 2. The Bikers went next to them in the centre of my deployment zone, giving them the ability to advance on any of the other objectives. The Rhino carrying the Veterans went next to them, with the Vanguard Veterans shielded by the ruins to the right.
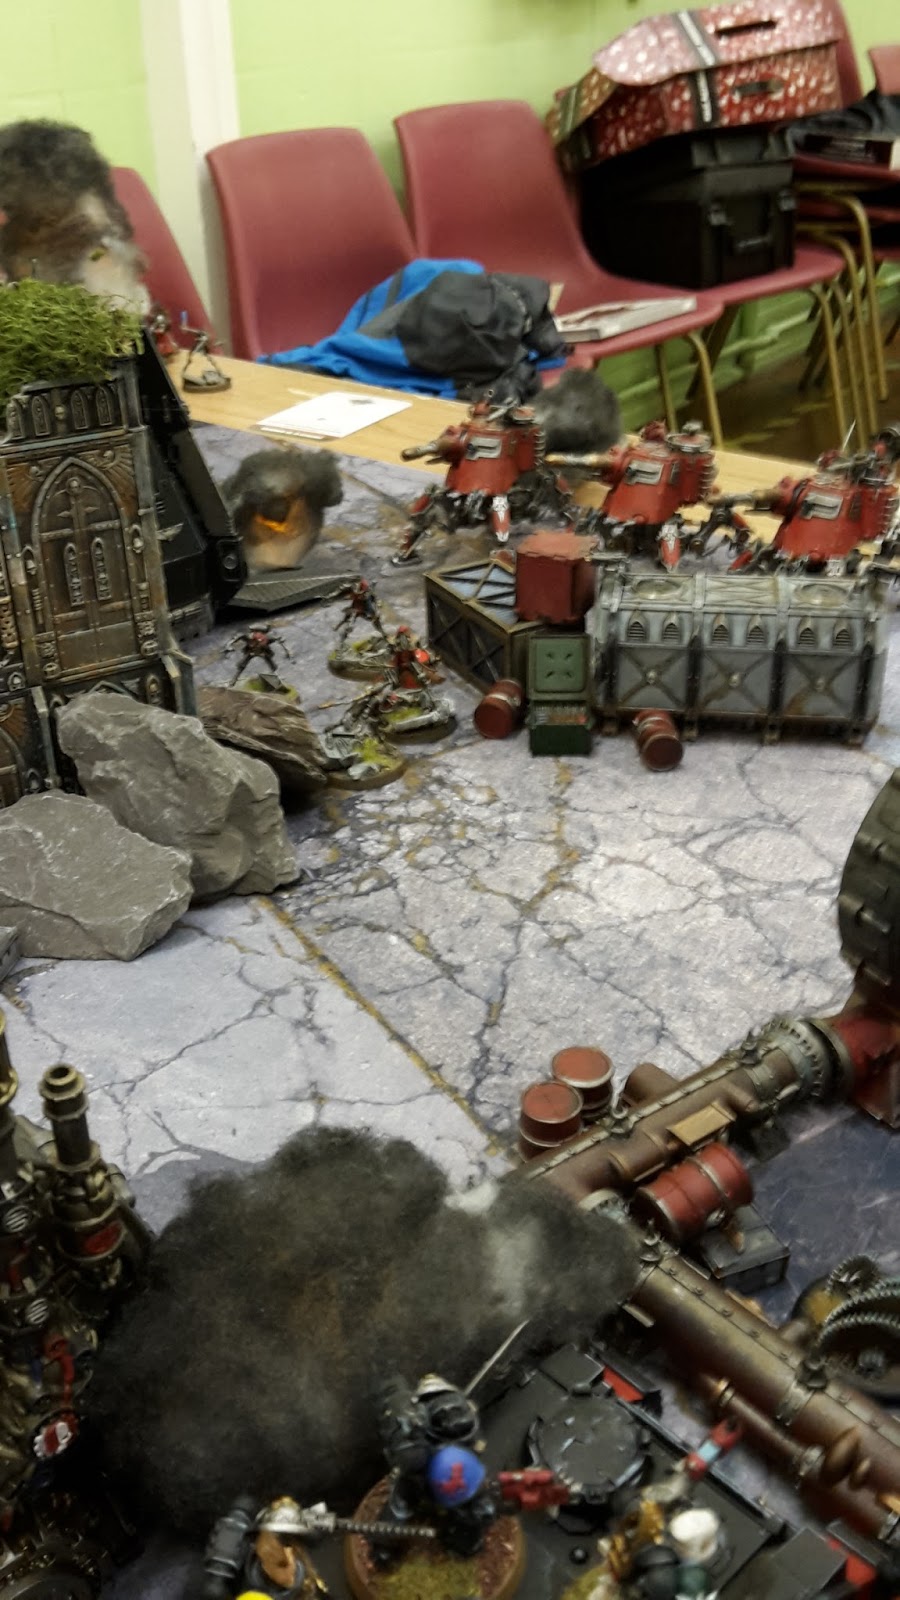
In reply, Harry set up the Sydonian Dragoons behind the ruins opposite the Stalker unit. Next to them went the Rangers and Infiltrators, keeping out of range or line of sight of the Deathwatch. Cawl led the unit of Destroyers and deployed behind the large central ruins. The Ruststalkers and Vanguard went next to them, while the Breachers set up behind the cargo containers. The Onager Dunecrawlers deployed on his left flank, with the second Vanguard unit sheltering in the ruins on the far left. Finally, the Rangers scouted forward into the shadow of the ruins in front of them.


Harry failed to seize the initiative and I took the first turn.
TURN 1- MECHANICUS
In the first turn, I drew Objective 4, Objective 5 and Hungry for Glory (issue a challenge).

The Drop Pod crashed into the north side of the ruins, securing the objective sheltered within. The Veterans disembarked, combat squading to target the foe with their Frag Cannons. The Bikers moved up to support them, moving into the large ruined structure on the Deathwatch left flank.


The Vanguard Veterans and Rhino advanced on the right flank, the Rhino turbo-boosting and crashing through the barricades to reach their objective.


One of the advanced Veteran squads fired on the Skitarii Vanguard with their two Frag Cannons, obliterating the unit. The second combat squad fired on the Destroyers, killing one and wounding the mighty Belisarius Cawl, despite poor wounding rolls (I scored 14 hits, but only 6 wounds, needing a 3+).


One Bike squad opened fire on the Destroyers, but failed to wound Cawl. The other unit fired on the Ruststalkers, wounding one of them.


The backfield Veterans searched for a target for their Stalker Bolters, but the Mechanicus and Skitarii forces remained hidden out of sight.
At the end of my turn, I scored First Blood, Objective 4 and Objective 5. I discarded Hungry for Glory.
TURN 1- MECHANICUS
In his first turn, Harry drew Objective 5, Objective 5 and Overwhelming Firepower (destroy a unit in the shooting phase).

Seeing the foe advance on them, Belisarius Cawl issued the order to respond in kind. On the right flank, the Rangers moved into the structure in front of them, supported by the advancing Dragoons and Infiltrators.


The Ruststalkers moved to engage the Deathwatch Veterans, as the Breachers mounted the Cargo Containers in front of them. On the right flank, the Vanguard emerged from the ruins.


The Skitarii Vanguard fired on the Vanguard Veterans, eliminating four of the squad and causing the survivor to flee after he failed his morale test.


The Breachers fired on the Rhino, wrecking the vehicle and forcing the Deathwatch Veterans to disembark.

In the centre of the field, the Destroyers fired their Heavy Grav Cannons at the Veterans in front of them. Harry rolled 7 wounds on the unit, killing the first two carrying the Frag Cannons. The Veteran holding the Storm Shield then blocked the remaining wounds. He soon succumbed to the Phosphor Blasters of the unit, with Cawl finishing off the rest of the unit with his firepower.
The Onagers fired their Neutron Lasers at the second unit of Veterans. Two shots hit on target, but one scattered onto Cawl. Fortunately, he passed his save and was unharmed. The two shots on target were sufficient to kill the 5 Veterans and take two hull points from the Drop Pod. The Rangers added their firepower to the enemy vehicle, wrecking it with their Arc Rifles.


The Dragoons attempted to assault the Bikers. Despite needing a 12" charge, they made it into combat (thanks to the +3 to charge move from the Dragoons). The Power Axe Veteran struck at the enemy walkers, glancing them once. Another Veteran managed to destroy one of the Dragoons with his Meltabombs. In reply, the remaining Dragoon slew three of the Bikers. The survivor failed his morale test, but was kept locked in combat.

At the end of his turn, Harry scored Objective 5 twice and one point for Overwhelming Firepower.
VICTORY POINTS:
Deathwatch- 3
Mechanicus- 3
Quite a brutal first turn. My Frag Cannons had taken out a unit, but thanks to some great deployment from Harry, most units were out of line of sight for the rest of my army. In reply, the combined forces of the Skitarii and Mechanicus had hammered my troops and taken out a good chunk of the army. A lucky long range charge from the Dragoons had not help matters, eliminating most of my Bike squad. It was only turn 1 and things were already looking bleak for the Deathwatch.
TURN 2- DEATHWATCH
This turn, I drew Objective 2, Objective 5 and Objective 4. A good draw for me, I already controlled two of them and had potential to get the third. I needed to rack up as many points early on, as I doubted I would have much army left for long to score in later turns.

The second Deathwatch Drop Pod arrived, crashing to the ground besides the wreck of the first one. Watch Captain Artemis led his squad to engage the enemy forces all around him.


The nearby Bikers moved up on the Breachers and Ruststalkers on the right of the ruins. On the right flank, the two Veterans squads emerged from the smoke of their wrecked transport to focus on the Skitarii forces.


The Librarian attempted to cast Enfeeble on the Destroyers, but the attempt was denied. He then fired on the unit with a Smite attack, but failed to cause any wounds.
Enacting their Furor Mission Tactics (Troops), the Veterans fired on the Skitarii Vanguard with their Infernus Heavy Bolters, killing three of the squad. The remaining Veterans accounted for another one with their Bolters. The lone survivor broke, fleeing towards his own lines.

The other unit fired their Infernus Bolters at the Breachers, wounding them once.
In the centre of the battlfield, the three Veterans fired their shotguns at the Rangers. Their Wyrmbreath shells felling four of the unit (template weapons). Artemis fired his combi-flamer at the unit, killing their leader. The Kraken bolt rounds (AP4) of the rest of the squad finished them off easily.

The Bikers split their fire at the units in front of them. One fired at the Ruststalkers, wounding another once. Three of the Veterans fired at the Breachers with their Hellfire rounds (2+ poisoned), wounding them four times. Amazingly, Harry failed three saves and two of the Breachers perished.
The Bikers charged, crashing into the Breachers and Ruststalkers. One Veteran struck at the Breacher, killing him outright. The rest struck at the Ruststalkers, but failed to do any harm with their combined attacks. In reply, the Ruststalkers killed three of the Bikers, the fourth only surviving as he was out of range of their attacks. The lone survivor passed his morale test and was locked in combat.


The Dragoon struck at the last Biker, but failed to do any harm. The Deathwatch Biker desperately tried to latch his Meltabombs onto the walker, but failed to score a hit with his attack.

At the end of my turn, I scored all three of my objectives.
TURN 2- MECHANICUS
This turn, Harry drew Objective 1, Objective 2 and Supremacy (hold at least 2 objectives and twice as many as your opponent).

The forces of the Mechanicus and Skitarii, under the orders of Cawl, advanced on Artemis and his squad. Cawl used his Canticles of the Archmagos to increase the ballistic skill of the nearby units.


The Dunecrawlers turned their Heavy Stubbers on Artemis' squad in the centre of the battlefield, causing 10 wounds with the hail of fire. Three of the Veterans succumbed to the massed firepower. They then used the Power of the Machine Spirit to fire their Neutron Lasers at the Veteran unit on the Rhino wreck. The unit went to ground and only one Veteran died after some poor scatter from Harry and great saves from me (for once!).
The Destroyers opened fire on Artemis' unit, killing another three of the Veterans. Cawl then targeted Artemis with his Solar Atomiser. Utilising ancient targeting protocols, the shot struck true and instantly killed the Deathwatch warlord (I failed my Look Out Sir roll and then my Invulnerable save).
Finally, the Infiltrators opened fire on the remnants of the squad. Their flurry of shots killed the remaining Veterans and wounded the Librarian. The Librarian passed his morale test and held firm.

The Infiltrators launched an assault on the wounded Librarian. The Deathwatch psyker struck valiantly, but failed to do any damage before being struck down.


The Dragoon struck at the Biker, wounding 4 times. Luck was not with me as I failed a single save and the Biker perished. The Sydonian walker only consolidated 1", failing to get in range of the objective for this turn.
The Deathwatch Biker attacked the Ruststalkers, killing one of the squad. He was easily cut down in reply.
At the end of his turn, Harry scored Slay the Warlord and discarded Objective 2.
VICTORY POINTS:
Deathwatch- 6
Mechanicus- 4
I had pulled a modest lead in victory points, but a large portion of my army was now gone. All that remained was to see if I would survive the battle.
TURN 3- DEATHWATCH
This turn, I drew Objective 2, Objective 6 and Harness the Warp. Unfortunately, only one of these was achievable this turn.

The Veterans on the right flank moved up to a better firing position on the enemy forces on the field. The two units of Veterans fired at the Ruststalkers, their Kraken Bolts (AP4 shells) killing two of the squad and wounding the Princeps, while the Infernus Heavy Bolters killed another. The Drop Pod fired at the unit, killing the last Ruststalker and leaving the Princeps on a single wound,


The Veterans in the ruins fired at the Infiltrators, but only managed to cause a single wound.
At the end of my turn, I scored Objective 2 and discarded Harness the Warp.
TURN 3- MECHANICUS
Harry drew Objective 2 once more, to go with Objective 1 and Supremacy from last turn.

The last Sydonian Dragoon and the Infiltrators advanced on the Veterans sheltering in the ruins. The Ruststalker Princeps moved up on the Drop Pod. Belisarius Cawl tried to lead his unit forward, but was slowed by the terrain around the ruins (Harry only rolled a 2 for his difficult terrain test). The Dunecrawlers moved up to engage the other Veterans sheltering behind the pipeline.


The Dunecrawlers used the power of the machine spirit to split their fire at the two units of Veterans. The Heavy Stubbers barked out at the unit on top of the wrecked Rhino, wounding them six times. Two of the Veterans fell to the massed firepower. They then fired their Neutron Lasers at the second squad. The Veterans went to ground and managed to pass all four of their cover saves to leave the squad unharmed.

The Destroyers fired at the Drop Pod, taking two hull points from it with their Grav fire. Cawl turned his Atomiser on the vehicle, utterly obliterating it in a massive explosion. The blast caught the nearby Princeps, who was fortunate to survive (the exploding Drop Pod wounded him, but he made his Feel no Pain roll!).
The Dragoon tried to charge the Veterans in the ruins, but fell just short of them (Harry failed the charge by 1" only).
At the end of his turn, Harry scored Objective 1.
VICTORY POINTS:
Deathwatch- 7
Mechanicus- 5
Things were still incredibly close. I was slightly ahead on points, but only had 13 models left and Harry still had a lot of firepower at his disposal.
TURN 4- DEATHWATCH
This turn, I drew Objective 3, Objective 3 and Objective 6. I couldn't have asked for a better draw, as I would easily claim Objective 3 this turn.

With so little of the force remaining, the only movement was the lone Vanguard Veteran, who climbed to the first level of the ruins to secure the objective at the top.

The squad of 2 Veterans opened fire on the Infiltrators, wounding one of them with their Infernus Heavy Bolter. The Stalker Veterans added their firepower, wounding them 5 times with their Kraken Bolts and killing three of the squad. The survivors broke, falling back toward Cawl and the Destroyers.

The other unit of Veterans spread out their formation, hoping to lessen the effect of the enemy blast weapons.
At the end of my turn, I scored Objective 3 twice and discarded Objective 6.
TURN 4- MECHANICUS
This turn, Harry drew Networked Archeotech (score one point if he controls Objective 2 or Objective 3, or D3 points if he controls both) to go with Objective 2 and Supremacy.

The Infiltrators rallied, advancing once more to secure the objective as the Dragoon moved up. The Dunecrawlers moved up on the Veterans, as Cawl led his unit through the ruins.


The Destroyers fired their Grav Cannons at the Veterans in front of them, but failed to kill any as the squad went to ground.
The Dunecrawlers fired their Heavy Stubbers at the two Veterans once more. Despite wounding 7 times, only one Veteran fell, leaving one survivor. They fired their Neutron Lasers at the second squad, but only hit with one of the shots and caused a single wound, which was saved by cover.
The Onager Dunecrawlers charged the unit. They Veterans struck with their grenades, but failed to cause any harm on the enemy walkers. The Dunecrawlers killed two of the squad in return. The Deathwatch attempted to flee the combat, but were locked in by the Mechanicus forces.


The Dragoon charged the Veterans in the ruins, only managing to hit with a single attack, but the wound was saved. The squad's grenades failed to cause any damage in reply.
At the end of his turn, Harry scored no points. The Deathwatch Veterans had stubbornly refused to die, preventing him from scoring Objective 2 and Supremacy as they were Objective Secured.
VICTORY POINTS:
Deathwatch- 9
Mechanicus- 5
TURN 5- DEATHWATCH
This turn, I drew Objective 3, Objective 6 and Kingslayer (kill the enemy warlord).

The lone Veteran decided to make a break for the enemy deployment zone (I was hoping to hide him and score Linebreaker), running to get into range.


As my other units were locked in combat, there was no shooting for me.
The Dunecrawlers attacked the Deathwatch, wounding them twice, but failing to get past their armour. The squad's grenade attack missed the target, causing no harm.
The Dragoon attacked the other unit of Veterans, killing one of the squad. The Veteran's failed to damage the Dragoon. The Veterans failed their morale test and fled 6" towards their lines.

At the end of my turn, I scored Objective 3 and discarded Kingslayer.
TURN 5- MECHANICUS
This turn, Harry had Networked Archeotech, Objective 2 and Supremacy.

Cawl continued his advance, while his forces moved to secure the objectives. Harry wanted to move the Destroyers back to target the lone Veteran, but he was unable to get line of sight on him.

In the assault phase, the Dunecrawlers killed one Veteran for no damage in return. This time, the Veterans passed their morale test. As the Veterans on Objective 2 had not yet rallied, Harry would be able to score the objective this turn.

At the end of his turn, Harry scored Objective 2 and 1 point for Networked Archeotech. He also scored Supremacy, rolling a 6 on the D3 roll and tying up the score!


We rolled to see if the game ended there and it did. We both scored Linebreaker to give the final result as:
VICTORY POINTS:
Deathwatch- 11
Mechanicus- 11
A draw!
AFTER-BATTLE THOUGHTS
Thanks to Harry for a fantastic game of 40k. Not only did it look great with two fully painted armies and some awesome terrain, it was also a very tense game that ended in a well deserved draw. It really did come down to the final die roll of the game. Had Harry not rolled the full amount for Supremacy, the game would have been mine!
I think the Deathwatch made a good account of themselves. They died pretty easily, but did take a lot of the enemy forces with them.
There were certainly a lot of learning points for me in the game. These included:
Grand Convocation Detachment
Belisarius Cawl (with D)
Tech Priest Dominus- Artificer Armour, Eradication Ray, Macrostubber, Mechadendrite Harness, Power Axe, Refractor Field, Scryer Skull (with D)
3 Kataphron Breachers- Arc Claw, Heavy Arc Rifle (B)
3 Kataphron Destroyers- Heavy Grav-cannon, Phosphor Blaster (D)
6 Rangers- 2 Arc Rifles, Omnispex, Alpha with Arc Maul and Arc Pistol (R)
6 Vanguard- 2 Plasma Calivers, Omnispex, Vanguard Alpha (V1)
6 Vanguard- Plasma Caliver, Vanguard Alpha (V2)
5 Infiltrators- Princeps, Flechette Blasters and Taser Goads (I)
5 Ruststalkers- Princeps with Chordclaw, Refractor Field, Omniscient Mask (RS)
2 Sydonian Dragoons- Phosphor Serpenta, Taser Lance (SD)
3 Onager Dunecrawlers- Cognis Heavy Stubber, Neutron Laser, Cognis Heavy Stubber (OD)


Harry's warlord was Cawl, giving him a re-roll for his Feel No Pain roll.
We rolled for mission and got Capture and Control (up to 3 cards each turn). We set up the objectives as shown below:

Harry won the roll for deployment and elected to go second. I set up the Stalker Boltgun unit in the ruins to the left, holding objective 2. The Bikers went next to them in the centre of my deployment zone, giving them the ability to advance on any of the other objectives. The Rhino carrying the Veterans went next to them, with the Vanguard Veterans shielded by the ruins to the right.
In reply, Harry set up the Sydonian Dragoons behind the ruins opposite the Stalker unit. Next to them went the Rangers and Infiltrators, keeping out of range or line of sight of the Deathwatch. Cawl led the unit of Destroyers and deployed behind the large central ruins. The Ruststalkers and Vanguard went next to them, while the Breachers set up behind the cargo containers. The Onager Dunecrawlers deployed on his left flank, with the second Vanguard unit sheltering in the ruins on the far left. Finally, the Rangers scouted forward into the shadow of the ruins in front of them.


Harry failed to seize the initiative and I took the first turn.
TURN 1- MECHANICUS
In the first turn, I drew Objective 4, Objective 5 and Hungry for Glory (issue a challenge).

The Drop Pod crashed into the north side of the ruins, securing the objective sheltered within. The Veterans disembarked, combat squading to target the foe with their Frag Cannons. The Bikers moved up to support them, moving into the large ruined structure on the Deathwatch left flank.


The Vanguard Veterans and Rhino advanced on the right flank, the Rhino turbo-boosting and crashing through the barricades to reach their objective.


One of the advanced Veteran squads fired on the Skitarii Vanguard with their two Frag Cannons, obliterating the unit. The second combat squad fired on the Destroyers, killing one and wounding the mighty Belisarius Cawl, despite poor wounding rolls (I scored 14 hits, but only 6 wounds, needing a 3+).

One Bike squad opened fire on the Destroyers, but failed to wound Cawl. The other unit fired on the Ruststalkers, wounding one of them.


The backfield Veterans searched for a target for their Stalker Bolters, but the Mechanicus and Skitarii forces remained hidden out of sight.
At the end of my turn, I scored First Blood, Objective 4 and Objective 5. I discarded Hungry for Glory.
TURN 1- MECHANICUS
In his first turn, Harry drew Objective 5, Objective 5 and Overwhelming Firepower (destroy a unit in the shooting phase).

Seeing the foe advance on them, Belisarius Cawl issued the order to respond in kind. On the right flank, the Rangers moved into the structure in front of them, supported by the advancing Dragoons and Infiltrators.


The Ruststalkers moved to engage the Deathwatch Veterans, as the Breachers mounted the Cargo Containers in front of them. On the right flank, the Vanguard emerged from the ruins.


The Skitarii Vanguard fired on the Vanguard Veterans, eliminating four of the squad and causing the survivor to flee after he failed his morale test.


The Breachers fired on the Rhino, wrecking the vehicle and forcing the Deathwatch Veterans to disembark.

In the centre of the field, the Destroyers fired their Heavy Grav Cannons at the Veterans in front of them. Harry rolled 7 wounds on the unit, killing the first two carrying the Frag Cannons. The Veteran holding the Storm Shield then blocked the remaining wounds. He soon succumbed to the Phosphor Blasters of the unit, with Cawl finishing off the rest of the unit with his firepower.
The Onagers fired their Neutron Lasers at the second unit of Veterans. Two shots hit on target, but one scattered onto Cawl. Fortunately, he passed his save and was unharmed. The two shots on target were sufficient to kill the 5 Veterans and take two hull points from the Drop Pod. The Rangers added their firepower to the enemy vehicle, wrecking it with their Arc Rifles.


The Dragoons attempted to assault the Bikers. Despite needing a 12" charge, they made it into combat (thanks to the +3 to charge move from the Dragoons). The Power Axe Veteran struck at the enemy walkers, glancing them once. Another Veteran managed to destroy one of the Dragoons with his Meltabombs. In reply, the remaining Dragoon slew three of the Bikers. The survivor failed his morale test, but was kept locked in combat.

At the end of his turn, Harry scored Objective 5 twice and one point for Overwhelming Firepower.
VICTORY POINTS:
Deathwatch- 3
Mechanicus- 3
Quite a brutal first turn. My Frag Cannons had taken out a unit, but thanks to some great deployment from Harry, most units were out of line of sight for the rest of my army. In reply, the combined forces of the Skitarii and Mechanicus had hammered my troops and taken out a good chunk of the army. A lucky long range charge from the Dragoons had not help matters, eliminating most of my Bike squad. It was only turn 1 and things were already looking bleak for the Deathwatch.
TURN 2- DEATHWATCH
This turn, I drew Objective 2, Objective 5 and Objective 4. A good draw for me, I already controlled two of them and had potential to get the third. I needed to rack up as many points early on, as I doubted I would have much army left for long to score in later turns.

The second Deathwatch Drop Pod arrived, crashing to the ground besides the wreck of the first one. Watch Captain Artemis led his squad to engage the enemy forces all around him.


The nearby Bikers moved up on the Breachers and Ruststalkers on the right of the ruins. On the right flank, the two Veterans squads emerged from the smoke of their wrecked transport to focus on the Skitarii forces.


The Librarian attempted to cast Enfeeble on the Destroyers, but the attempt was denied. He then fired on the unit with a Smite attack, but failed to cause any wounds.
Enacting their Furor Mission Tactics (Troops), the Veterans fired on the Skitarii Vanguard with their Infernus Heavy Bolters, killing three of the squad. The remaining Veterans accounted for another one with their Bolters. The lone survivor broke, fleeing towards his own lines.

The other unit fired their Infernus Bolters at the Breachers, wounding them once.
In the centre of the battlfield, the three Veterans fired their shotguns at the Rangers. Their Wyrmbreath shells felling four of the unit (template weapons). Artemis fired his combi-flamer at the unit, killing their leader. The Kraken bolt rounds (AP4) of the rest of the squad finished them off easily.

The Bikers split their fire at the units in front of them. One fired at the Ruststalkers, wounding another once. Three of the Veterans fired at the Breachers with their Hellfire rounds (2+ poisoned), wounding them four times. Amazingly, Harry failed three saves and two of the Breachers perished.
The Bikers charged, crashing into the Breachers and Ruststalkers. One Veteran struck at the Breacher, killing him outright. The rest struck at the Ruststalkers, but failed to do any harm with their combined attacks. In reply, the Ruststalkers killed three of the Bikers, the fourth only surviving as he was out of range of their attacks. The lone survivor passed his morale test and was locked in combat.


The Dragoon struck at the last Biker, but failed to do any harm. The Deathwatch Biker desperately tried to latch his Meltabombs onto the walker, but failed to score a hit with his attack.

At the end of my turn, I scored all three of my objectives.
TURN 2- MECHANICUS
This turn, Harry drew Objective 1, Objective 2 and Supremacy (hold at least 2 objectives and twice as many as your opponent).

The forces of the Mechanicus and Skitarii, under the orders of Cawl, advanced on Artemis and his squad. Cawl used his Canticles of the Archmagos to increase the ballistic skill of the nearby units.


The Dunecrawlers turned their Heavy Stubbers on Artemis' squad in the centre of the battlefield, causing 10 wounds with the hail of fire. Three of the Veterans succumbed to the massed firepower. They then used the Power of the Machine Spirit to fire their Neutron Lasers at the Veteran unit on the Rhino wreck. The unit went to ground and only one Veteran died after some poor scatter from Harry and great saves from me (for once!).
The Destroyers opened fire on Artemis' unit, killing another three of the Veterans. Cawl then targeted Artemis with his Solar Atomiser. Utilising ancient targeting protocols, the shot struck true and instantly killed the Deathwatch warlord (I failed my Look Out Sir roll and then my Invulnerable save).
Finally, the Infiltrators opened fire on the remnants of the squad. Their flurry of shots killed the remaining Veterans and wounded the Librarian. The Librarian passed his morale test and held firm.

The Infiltrators launched an assault on the wounded Librarian. The Deathwatch psyker struck valiantly, but failed to do any damage before being struck down.


The Dragoon struck at the Biker, wounding 4 times. Luck was not with me as I failed a single save and the Biker perished. The Sydonian walker only consolidated 1", failing to get in range of the objective for this turn.
The Deathwatch Biker attacked the Ruststalkers, killing one of the squad. He was easily cut down in reply.
At the end of his turn, Harry scored Slay the Warlord and discarded Objective 2.
VICTORY POINTS:
Deathwatch- 6
Mechanicus- 4
I had pulled a modest lead in victory points, but a large portion of my army was now gone. All that remained was to see if I would survive the battle.
TURN 3- DEATHWATCH
This turn, I drew Objective 2, Objective 6 and Harness the Warp. Unfortunately, only one of these was achievable this turn.

The Veterans on the right flank moved up to a better firing position on the enemy forces on the field. The two units of Veterans fired at the Ruststalkers, their Kraken Bolts (AP4 shells) killing two of the squad and wounding the Princeps, while the Infernus Heavy Bolters killed another. The Drop Pod fired at the unit, killing the last Ruststalker and leaving the Princeps on a single wound,


The Veterans in the ruins fired at the Infiltrators, but only managed to cause a single wound.
At the end of my turn, I scored Objective 2 and discarded Harness the Warp.
TURN 3- MECHANICUS
Harry drew Objective 2 once more, to go with Objective 1 and Supremacy from last turn.

The last Sydonian Dragoon and the Infiltrators advanced on the Veterans sheltering in the ruins. The Ruststalker Princeps moved up on the Drop Pod. Belisarius Cawl tried to lead his unit forward, but was slowed by the terrain around the ruins (Harry only rolled a 2 for his difficult terrain test). The Dunecrawlers moved up to engage the other Veterans sheltering behind the pipeline.


The Dunecrawlers used the power of the machine spirit to split their fire at the two units of Veterans. The Heavy Stubbers barked out at the unit on top of the wrecked Rhino, wounding them six times. Two of the Veterans fell to the massed firepower. They then fired their Neutron Lasers at the second squad. The Veterans went to ground and managed to pass all four of their cover saves to leave the squad unharmed.

The Destroyers fired at the Drop Pod, taking two hull points from it with their Grav fire. Cawl turned his Atomiser on the vehicle, utterly obliterating it in a massive explosion. The blast caught the nearby Princeps, who was fortunate to survive (the exploding Drop Pod wounded him, but he made his Feel no Pain roll!).
The Dragoon tried to charge the Veterans in the ruins, but fell just short of them (Harry failed the charge by 1" only).
At the end of his turn, Harry scored Objective 1.
VICTORY POINTS:
Deathwatch- 7
Mechanicus- 5
Things were still incredibly close. I was slightly ahead on points, but only had 13 models left and Harry still had a lot of firepower at his disposal.
TURN 4- DEATHWATCH
This turn, I drew Objective 3, Objective 3 and Objective 6. I couldn't have asked for a better draw, as I would easily claim Objective 3 this turn.

With so little of the force remaining, the only movement was the lone Vanguard Veteran, who climbed to the first level of the ruins to secure the objective at the top.

The squad of 2 Veterans opened fire on the Infiltrators, wounding one of them with their Infernus Heavy Bolter. The Stalker Veterans added their firepower, wounding them 5 times with their Kraken Bolts and killing three of the squad. The survivors broke, falling back toward Cawl and the Destroyers.

The other unit of Veterans spread out their formation, hoping to lessen the effect of the enemy blast weapons.
At the end of my turn, I scored Objective 3 twice and discarded Objective 6.
TURN 4- MECHANICUS
This turn, Harry drew Networked Archeotech (score one point if he controls Objective 2 or Objective 3, or D3 points if he controls both) to go with Objective 2 and Supremacy.

The Infiltrators rallied, advancing once more to secure the objective as the Dragoon moved up. The Dunecrawlers moved up on the Veterans, as Cawl led his unit through the ruins.


The Destroyers fired their Grav Cannons at the Veterans in front of them, but failed to kill any as the squad went to ground.
The Dunecrawlers fired their Heavy Stubbers at the two Veterans once more. Despite wounding 7 times, only one Veteran fell, leaving one survivor. They fired their Neutron Lasers at the second squad, but only hit with one of the shots and caused a single wound, which was saved by cover.
The Onager Dunecrawlers charged the unit. They Veterans struck with their grenades, but failed to cause any harm on the enemy walkers. The Dunecrawlers killed two of the squad in return. The Deathwatch attempted to flee the combat, but were locked in by the Mechanicus forces.


The Dragoon charged the Veterans in the ruins, only managing to hit with a single attack, but the wound was saved. The squad's grenades failed to cause any damage in reply.
At the end of his turn, Harry scored no points. The Deathwatch Veterans had stubbornly refused to die, preventing him from scoring Objective 2 and Supremacy as they were Objective Secured.
VICTORY POINTS:
Deathwatch- 9
Mechanicus- 5
TURN 5- DEATHWATCH
This turn, I drew Objective 3, Objective 6 and Kingslayer (kill the enemy warlord).

The lone Veteran decided to make a break for the enemy deployment zone (I was hoping to hide him and score Linebreaker), running to get into range.


As my other units were locked in combat, there was no shooting for me.
The Dunecrawlers attacked the Deathwatch, wounding them twice, but failing to get past their armour. The squad's grenade attack missed the target, causing no harm.
The Dragoon attacked the other unit of Veterans, killing one of the squad. The Veteran's failed to damage the Dragoon. The Veterans failed their morale test and fled 6" towards their lines.

At the end of my turn, I scored Objective 3 and discarded Kingslayer.
TURN 5- MECHANICUS
This turn, Harry had Networked Archeotech, Objective 2 and Supremacy.

Cawl continued his advance, while his forces moved to secure the objectives. Harry wanted to move the Destroyers back to target the lone Veteran, but he was unable to get line of sight on him.

In the assault phase, the Dunecrawlers killed one Veteran for no damage in return. This time, the Veterans passed their morale test. As the Veterans on Objective 2 had not yet rallied, Harry would be able to score the objective this turn.

At the end of his turn, Harry scored Objective 2 and 1 point for Networked Archeotech. He also scored Supremacy, rolling a 6 on the D3 roll and tying up the score!


We rolled to see if the game ended there and it did. We both scored Linebreaker to give the final result as:
VICTORY POINTS:
Deathwatch- 11
Mechanicus- 11
 |
| End of the game. |
A draw!
AFTER-BATTLE THOUGHTS
Thanks to Harry for a fantastic game of 40k. Not only did it look great with two fully painted armies and some awesome terrain, it was also a very tense game that ended in a well deserved draw. It really did come down to the final die roll of the game. Had Harry not rolled the full amount for Supremacy, the game would have been mine!
I think the Deathwatch made a good account of themselves. They died pretty easily, but did take a lot of the enemy forces with them.
There were certainly a lot of learning points for me in the game. These included:
- Going after Cawl and the Destroyers with the second unit of Frag Cannons was a mistake. Cawl is so damn tough that Harry was able to tank a lot of the wounds caused and save them from harm. I should have gone after the Ruststalkers with the unit. At S6, I would have ignored their Feel no Pain and probably would have wiped them out. This in turn would have saved by unit of Bikers in the subsequent turns.
- The Frag Cannon unit is very expensive and only lasts a single turn. I think it is worth the sacrifice to use them in a sacrificial roll, but it is a good chunk of the army to do so.
- Deathwatch Shotguns are pretty awesome. I wasn't really sold on them when the codex first came out, but they are great. Three template attacks from the unit are pretty brutal against T3 units and caused a lot of damage on the Rangers.
- The Drop Pod is not a great delivery vehicle for Artemis and his unit. They cannot charge from it and are too easily wiped out in reply. As expensive as the Corvus Blackstar is, I think it is the better option for an assault unit. I will need to get it painted for the rematch.
- My army as it is now really struggles against 2+ armour saves and vehicles. The Frag Cannons are the only unit that can take on Vehicles effectively and they generally die on turn 1. I need to think about investing in some Meltaguns in the army.
- Special Issue Ammunition is great. It gives you tools for dealing with a lot of opponents. Shroudsong was effectively neutered as I had army-wide Ignores cover on my bolters. In addition, the AP4 shells were great for negating much of Harry's army's armour saves.
Cawl was pretty damn effective in the game. After turn 1, I decided not to waste too much firepower at trying to take him out as he was simply too tough. The fact that he also killed Artemis in a single shot added to his power. I kept trying to convince Harry to charge in to combat so that I could use Artemis' D grenade on Cawl, but oddly enough he was not interested in doing that.
Once again, thanks to Harry for an awesome game. Be sure to check out his Youtube channel to see the video battle report of the game and get the battle from his perspective. Lets us know if you like this approach and we will hopefully be doing more of them in the future.
Sounds like a well-enjoyed battle! I like the format of the pictures/arrows, etc. I'll scour the website to see if you have an article entailing how you're doing that ;-)
ReplyDeleteNo article on Battle Chronicler, I'm afraid. No interest in it before.
DeleteI think Harry deserved to roll that 6 to tie the game as the cards had really not seemed to be helping him mid game, always needing obj 2 and 3. But certainly a fun battle report to read, everyone loves a good close game.
ReplyDeleteYeah, it was a lot of fun.
DeleteGood game.
ReplyDeleteBeautiful models and terrain. It was a treat to read.
ReplyDeleteCheers! Hopefully there'll be a few more over the coming year.
Delete