
This week's battle report sees my Deathwatch army take on a Battlesuit-heavy Tau force in the Cleanse and Control maelstrom mission (3 cards in a turn).
This game was played against Andrew at the Newcastle Warlords gaming club. Andrew is just getting back into 40k and had a really nice looking Tau army for me to play against (painted by a friend he wanted me to add).

My army consisted of:
Combined Arms Detachment
Combined Arms Detachment
Watch Captain Artemis (with V1)
Librarian- Mastery Level 2, Force Sword, Meltabombs (with V1)
5 Veterans- Heavy Thunder Hammer, 2 Deathwatch Shotguns, 2 Storm Shields, Power Maul, Power Sword (V1)
Drop Pod (DP2)
5 Veterans- 4 Frag Cannons, Auspex, Storm Shield (V2)
Drop Pod (DP1)
10 Veterans- 2 Infernus Heavy Bolters (V3 and V4)
Rhino (R)
5 Veterans- Stalker Pattern Boltguns (V5)
4 Bikers- 3 Power Swords, 1 Power Axe (B1)
4 Biker- 3 Power Swords, 1 Power Maul (B2)
Garran Branatar- Terminator Armour, Heavy Flamer, Power Fist with Auxiliary Meltagun (T)
My warlord trait for Artemis was Vigilance Incarnate, allowing me to change the Mission Tactics one more time (so two times in total). My Librarian rolled on Biomancy, getting Smite, Enfeeble and Haemorrhage.
This is the 1500 points list that I am considering taking to Birthday Bash 2.0 in February. For more in-depth thoughts on my list, see the Initial List Thoughts post. This would be my first outing with this version of the army and first off I would be taking on one of the toughest match ups for Space Marines, the dreaded Tau.
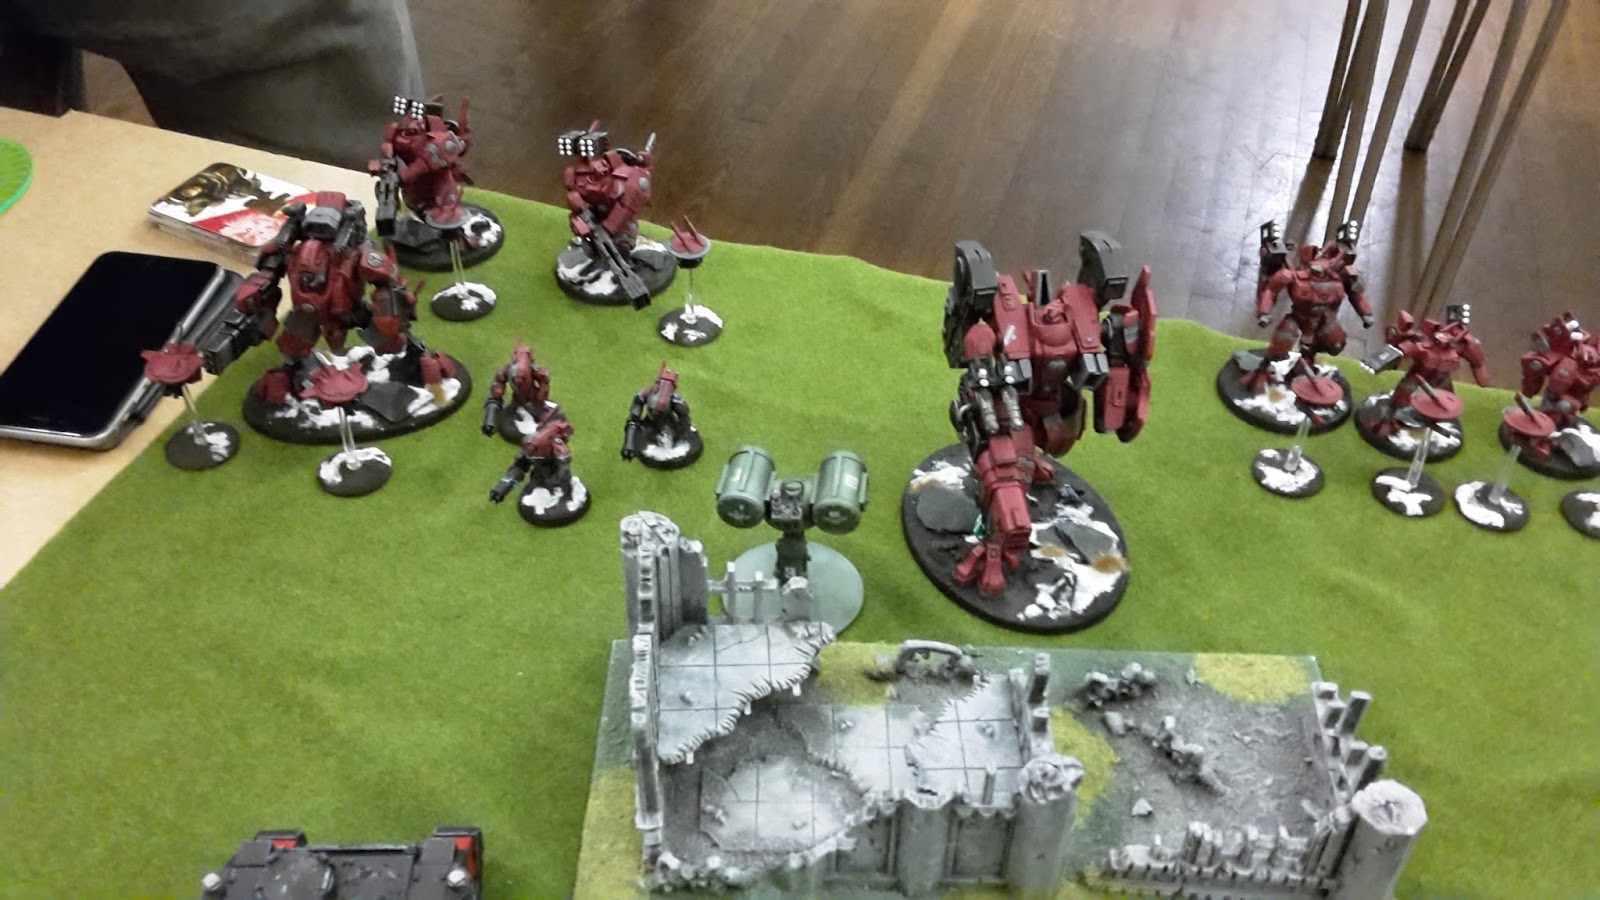
Andrew's list consisted of:
Retaliation Cadre
Commander- 2 Missile Pods, Crisis "Iridium" Battlesuit, Target Lock, Drone Commander, 2 Marker Drones (with CS1)
3 Crisis Suits- Missile Pods, Command and Control Node, Multi-spectral Sensor Suite, 4 Marker Drones (CS2)
3 Crisis Suits- 2 Shield Drones, Plasma Rifles (CS2)
3 Crisis Suits- 2 Shield Drones, Plasma Rifles (CS3)
2 Broadsides- 2 Shield Drones (B)
Riptide- Ion Accelerator, Early Warning Override, Stimulant Injector (R)
Optimised Stealth Cadre
3 Stealth Suits- Homing Beacon, Shas-vre (SS1)
3 Stealth Suits- Homing Beacon, Shas-vre (SS2)
Ghostkeel- TL Fusion Blaster, 2 Stealth Drones (G)
His warlord trait was Through Unity, Devastation, giving the commander a one use only re-roll to hit of 1's bubble.
3 Stealth Suits- Homing Beacon, Shas-vre (SS2)
Ghostkeel- TL Fusion Blaster, 2 Stealth Drones (G)
His warlord trait was Through Unity, Devastation, giving the commander a one use only re-roll to hit of 1's bubble.
A lot of potent firepower in his army. The only unit with Interceptor is the Riptide, which is a bit of a relief, but he could still cause a lot of problems for my Drop Pod squads. Obviously, taking out the Marker lights would be a priority (if this was possible), as my Bikers would want their Jink saves. The Optimised Stealth Cadre is a very powerful formation available to the Tau. It gives the Stealth Suits and Ghostkeel Ignores cover, more accurate firepower and allows them to shoot the rear armour of vehicle. This would only affect my Rhino, but just one unit could easily eliminate it with one volley.
We deployed the objectives as shown below:

Andrew won the roll for deployment zone, choosing the side with more objectives in the half. I won the roll for deployment and chose to go first. Against Tau, going second with my army wasn't really an option.
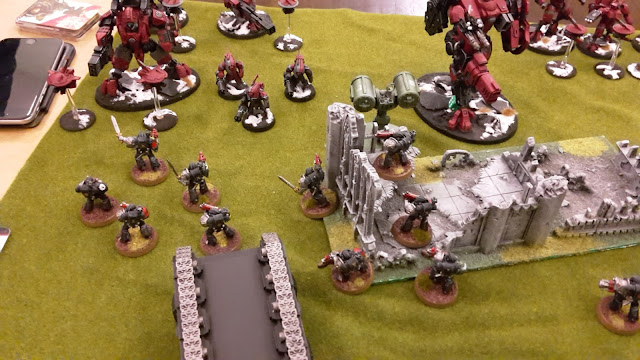
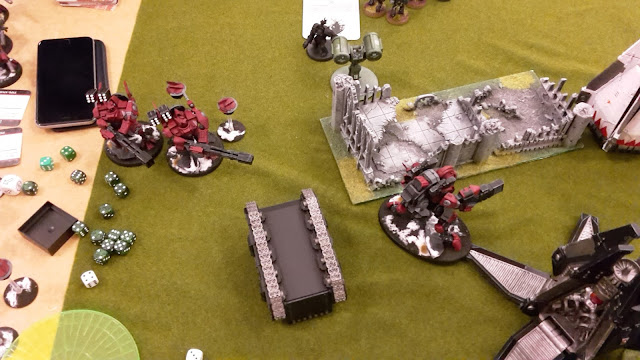
I deployed the Stalker Boltgun squad in the ruins to the right, near the objective. The Rhino went beside the woods to the left, ready to advance. The two Bike squads went in the centre, I could use their mobility to get to most of the board in the first couple of turns.
In reply, Andrew went for a refused flank. He deployed his army on his right flank, opposite my Rhino. This was a good move, as it essentially took my Stalker squad out of the game. The Ghostkeel, a Stealth Suit squad and the Broadsides went on the far right. The Riptide went next to them, behind the ruins. The Commander joined a Crisis Suit team in the centre, backed up by the other two Crisis Suit teams and the second Stealth Suit team.
My plan was to rush the Tau as quickly as possible. This is generally the best tactic for going up against Tau. I would probably take significant casualties in the first couple of turns, but hopefully once I got into combat, the game would turn in my favour. I would also try and grab what maelstrom points I could. It doesn't pay to forget the cards in a maelstrom game and focus on just killing the enemy units.


Andrew failed to seize the initiative (thankfully!) and I took the first turn.
TURN 1- DEATHWATCH
At the start of the game, I drew Objective 3, Objective 4 and Objective 4. This was fortunate for me, as I would easily be able to score objective 4 this turn.

The Drop Pod carrying the Frag Cannon Veterans arrived, crashing to the ground besides objective 2. I had originally planned to bring them in beside the Ghostkeel and Stealth Suits, but the Pod scattered back 8" towards the centre.
The rest of the Deathwatch advanced, the Bikers moving towards the Tau lines, while the Veteran Squad 5 picked their way through the ruins to get line of sight on the Tau and secure the objective.


The Riptide opened fire on the Veterans with his Interceptor fire. The Ion Accelerator failed its Gets Hot roll (fortunate for me), but the Plasma fire killed the Sergeant with the Storm Shield (who had positioned himself forwards to absorb the fire).
In the shooting phase, the Deathwatch enacted their Elites Mission Tactics and the Frag Cannons fired on the Riptide. They hit five times, but only caused two wounds (after I rolled a triple 1 to wound), one of which got through the invulnerable save of the Riptide. That did not go as planned!
The Bikers fired at the Stealth Suits, wounding them twice, but failing to get past their cover save. The second Biker unit fired on the nearby Crisis Suits with their AP3 shells, killing two of the Drones and wounding one of the suits. The Rhino turbo-boosted forwards to get into range of the Tau.
At the end of my turn, I scored Objective 4 twice.
TURN 1- TAU
In his first turn, Andrew drew Objective 3, Objective 5 and Witchhunter (kill an enemy psyker).

The Tau moved away from the approaching Deathwatch army, ready to engage them with their superior firepower.


The Broadsides opened fire on the Rhino in front of them, hitting twice but failing to even glance after some very poor AP rolls. The Stealth Suits fired at the enemy transport, wrecking it after striking its vulnerable rear armour. The two Veteran squads inside deployed, one moving into the cover of the ruins.
The Ghostkeel opened fire on the squad in front of it, killing two of the squad.

On the other flank, the Crisis Suits opened fire on Veteran Squad 1, easily wiping them out with their plasma fire.

The Marker Drones targeted the Bikers in front of them, scoring 6 hits thanks to the drone command of the Tau Commander. The Commander led the Crisis Suits in opening fire on the Veteran squad in the ruins. Despite scoring 7 wounds, only one Veteran fell as their armour held out. The second unit of Stealth Suits fired at the same squad, killing another one of the Veterans.
The final unit of Crisis Suits fired at the Bikers. Utilising the Marker Lights, they denied the unit their Jink save and easily wiped them out.

The Stealth Suits then used their assault moves to claim the objectives, the rest of the army moving away from the Deathwatch.

At the end of his turn, Andrew scored Objective 5 and First Blood.
VICTORY POINTS:
Deathwatch- 2
Tau- 2
That was a brutal first turn. My Frag Cannons had achieved nothing of note and were wiped out in reply. The Tau were able to kill off three of my units and diminish a couple more for no loss in return. This could be a very quick game if things continued in this way!
TURN 2- DEATHWATCH
This turn, I drew Objective 3 and Objective 5 to go with Objective 3 from last turn. I could make use of my Objective Secured units to score objective 3 this turn and would also score 5 if I could take care of the Stealth Suits.

The second Drop Pod carrying Artemis, the Librarian and the combat Veterans arrived, landing right beside the Riptide and Tau Commander. I had decided to go for it, needing to get into combat as soon as possible. The remaining Bikers moved up on the Crisis Suits in front of them, they were the bigger threat than the Crisis Suits. The other Veterans advanced on the Tau positions.


The Riptide fired its Interceptor shots once more. I didn't think Andrew would risk the overcharged shot with my Veterans so close to the Tau lines, but he did. Fortunately for him, the shot did not scatter and he hit the Veterans square, wounding them 7 times. The Storm Shields of the unit bore some of the brunt, but three of the squad still died (two Storm Shields and the Heavy Thunder Hammer).
The Librarian attempted to cast Haemorrhage on the Crisis Team in front of him, but failed to manifest the power. He then cast Smite on the team, wounding one of the suits, before finally using Force on himself.
In the shooting phase, the Veterans in the ruins opened fire on the Stealth Suits with their Infernus Heavy Bolters. The Heavy Flamers succeeded in killing two of the squad.
The newly arrived Veterans fired their shotguns at the Tau Commander's squad, hitting them 10 times with the template attack and killing two of the Drones. The Drop Pods added their firepower, killing another of the Drones.
The Bikers chose to split their fire between the Tau in front of them. One Biker fired at the Stealth Suits, but failed to get past their cover saves. The other Bikers fired at the Crisis suits with their AP3 shells and managed to wipe them out.

The Bikers assaulted the Stealth Suits, easily slaying them with their power weapons and consolidating onto the objective.

The Veterans in the ruins assaulted the other surviving Stealth Suit, also killing him and securing the objective.

The other Veteran unit on the left flank assaulted the Tau Commander and his unit. I need to tie up this unit in combat or they would decimate Artemis and his unit or kill off the Bikers with ease next turn. The squad managed to survive the overwatch fire coming at them and made it into combat. The Veterans struck at the squad, killing one of the Drones. The Drones struck back, killing one of the Veterans. The other Tau struck at the Veterans, but were unable to harm them. The combat was a draw, so I was able to lock the unit in combat.
At the end of my turn, I scored all my objectives for 3 points.
TURN 2- TAU
This turn, Andrew drew Blood and Guts (destroy a unit in the assault phase) to go with Objective 3 and Witchhunter.

The Riptide moved up to engage the Watch Captain's squad, while the Ghostkeel moved to target the Veterans beside the objective. The Broadsides advanced on the field. On the other flank, the Crisis Suits moved away from the Bikers.

The Broadsides opened fire on the Drop Pod. Andrews rolled a double 1 to hit. The weapons were twin-linked, but he managed to roll another double 1 or the re-roll too! The Ghostkeel fired at the Veterans in front of it, killing one of them.


The Crisis Suits fired at the Bikers, wounding them four times, but none of the Jinking Bikers fell.
In the assault phase, the Ghostkeel assaulted the Veterans. The Heavy Flamers wounded the Ghostkeel twice with their overwatch fire, but could not get past their armour. The Hammer of Wrath killed one of the Veterans, the other Veteran striking down a Drone in combat. The Ghostkeel wiped out the rest of the Veterans and consolidated onto the objective.


The Riptide assaulted Artemis' squad. The Watch Captain stepped forward, launching his Stasis Grenade at the Tau construct. The grenade hit and devastated the Riptide, destroying it utterly in a single blow (I rolled a 6 on the Destroyer table and the Riptide was annihilated!).
In the other combat, both sides struck at one another, but neither was able to slay their foe and the combat was drawn.
At the end of his turn, Andrew scored Blood and Guts and Objective 3.
VICTORY POINTS:
Deathwatch- 5
Tau- 4
Things really turned around for me in that turn as I was able to wipe out a number of the Tau units in combat. The real highlight was Artemis taking out the Riptide with his Stasis Grenade, it was the best result for me to get the first time I used it!
TURN 3- DEATHWATCH
This turn, I drew Objective 2, Objective 5 and Objective 6.

Garran Branatar, the lone Terminator, arrived, deep striking beside the Ghostkeel. The Bikers moved to engage the Crisis Team near the woodlands, while the Stalker Boltgun squad continued their advance. Artemis led his unit towards the Tau Commander.


In the psychic phase, the Librarian cast enfeeble on the Crisis Suit Team, then cast force on himself.
The Bikers opened fire on the Tau in front of them, hitting once with their snap shots, but failing to wound (even with their poisoned shells). The nearby Veterans opened fire with their Stalker weapons, killing two of the Drones accompanying the squad.
The Terminator fired at the Ghostkeel, killing one of the Drones with his Heavy Flamer.
In the assault phase, the Bikers assaulted the Crisis Team. They struck at the Tau, killing two of the squad with their Power Swords. The lone Tau struck back, but failed to cause any harm before being finished off with the Power Axe of one of the Veterans.


Artemis led his squad in a charge on the other Crisis Team. The Librarian issued a challenge that the Tau Commander accepted. I didn't have any AP2 weapons and figured the Librarian would be the best bet to kill the Commander with his Force Weapon if he happened to fail a save. The Librarian struck at the Tau warlord, wounding him twice but failing to get past his armour. The Tau Commander struck at the Librarian, also wounding him twice. I failed both my saves and the Librarian was vanquished!
Artemis and the Veterans struck at the Crisis Team, killing the last two Drones and two of the Battlesuits. The Tau killed one of the Deathwatch in reply. The Deathwatch won the combat, but the Tau passed their morale test and kept on fighting.

At the end of my turn, I scored Objective 2 and discarded Objective 6.
TURN 3- TAU
This turn, Andrew drew Objective 5 to go with Objective 3 and Witchhunter.

The Ghostkeel advanced on the Drop Pod, while the Broadsides moved away from the Terminator.
The Broadsides opened fire on Garran, but failed to get past his armour. The Ghostkeel managed to kill him with his Melta shot.
In the combat, Artemis killed the last Crisis Suit. The Veterans struck at the Commander and managed to wound him once. The Commander was able to bring down one of the Veterans, but his morale failed him and he fled from the combat, being cut down as he tried to flee.

At the end of the turn, Andrew scored no points and discarded Witchhunter. I scored Slay the Warlord.
VICTORY POINTS:
Deathwatch- 7
Tau- 4
TURN 4- DEATHWATCH
This turn, I drew Objective 1 and Objective 2 to go with Objective 5 from last turn.

Artemis led the Veterans on the Broadsides, while the Bikers moved to secure the central objective. The Stalker Veterans on the right flank advanced, but a poor terrain roll saw them fall short of the objective. Seeing the threats left on the battlefield, Artemis ordered the Deathwatch to switch to Malleus Mission Tactics.


In the shooting phase, the Bikers fired at the Ghostkeel, wounding it twice. Artemis fired his combi-flamer at the Broadsides, killing one of the Drones. The Shotgun Veterans killed another of the Drones, leaving only the Broadside Battlesuits left.
Artemis led the Veterans in an assault on the Broadsides. The Marines struck at the Tau battlesuits, but were unable to get past their considerable armour. The Broadsides were able to kill one of the Veterans, but the remaining squads held firm.

At the end of my turn, I scored Objective 2 and Objective 5.
TURN 4- TAU
Andrew drew Objective 4 to go with Objective 3 and Objective 5.

The Ghostkeel moved to secure the objective besides the ruins. The Suit opened fire on the Bikers, but failed to harm the jinking Bikers.

In the combat, the Veterans wounded the Broadsides twice but could not get past their armour. The Broadsides killed another Veteran.
At the end of his turn, Andrew scored Objective 3 and discarded Objective 4.
VICTORY POINTS:
Deathwatch- 9
Tau- 5
At this stage, things were looking very good for the Deathwatch. I was ahead on points and there was not much of the Tau army left.
TURN 5- DEATHWATCH
This turn, I drew Supremacy (hold at least 2 objective and twice as many as your opponent) and Objective 6 and had Objective 1 from last turn.

The Bikers moved up on the Ghostkeel, while the Veterans on the right flank continued to advance on the objective.


The Bikers fired at the Ghostkeel, wounding it once more. They then assaulted the Battlesuit, easily killing it with their Power Weapons.

In the combat with the Broadsides, neither side could cause any harm on the other, resulting in a drawn combat.
At the end of my turn, I scored 2 points for Supremacy and scored Objective 1. I discarded Objective 6.
TURN 5- TAU
This turn, Andrew drew Objective 2, Objective 3 and Objective 5.

With the only Tau unit locked in combat, this would be a quick turn. The Deathwatch failed to harm the Broadsides in combat. In reply, the Tau caused two wounds. I failed both saves, losing the last Veteran and taking a wound on Artemis.

Andrew scored no points.
VICTORY POINTS:
Deathwatch- 12
Tau- 5
We rolled to see if the game would end and it continued.
TURN 6- DEATHWATCH
This turn, I drew Objective 1, Kingslayer (kill the enemy warlord) and Domination (control all the objectives).

The Bikers moved up to support Captain Artemis, assaulting the Broadsides. The Veterans struck at the Broadsides, but failed to do any damage, even the Power Axe failed to wound. The combat was drawn.


At the end of my turn, I scored two points for Kingslayer and Objective 1. I discarded Domination.
TURN 6- TAU
Andrew had Objective 2, Objective 3 and Objective 5.

In the combat, the Deathwatch and Tau struck at one another. The Power Axe managed to take a wound off the Broadsides, but they passed their morale test.

At the end of the turn, Andrew scored no points. With that, the game ended.
VICTORY POINTS:
Deathwatch- 16
Tau- 5
A win for the Deathwatch.
AFTER-BATTLE THOUGHTS
Thanks to Andrew for a great game and a great test of my Deathwatch.
I thought I was in serious trouble after the first turn. My Frag Cannons had failed to cause any damage to the Tau army thanks to some poor Drop Pod scatter and poor rolling. I really didn't cause many casualties in the first turn, whereas Andrew took out several important units. I figured the Tau would be a tough match up for my army, but I thought the game was going to be over very quickly.
As it was, once I started to get into combat with them, they folded pretty quickly (as you would expect for Tau). The Bikers with their Power Weapons were great for taking on the Battlesuits, able to ignore their armour. They also get twin-linked Bolters with special ammunition, making the AP3 shells very potent to take out the Tau.
Also, I could not have asked for a better result when using Artemis' Stasis Grenade for the first time. Taking out the Riptide in a single attack was amazing. If not for that, I think I would have struggled to kill it and it would have either slowly wiped me out in combat or tied me up for the rest of the game.
I am also coming to appreciate the Mission Tactics more and more. Getting army wide re-rolls against certain units is a great bonus. It also helped that most of Andrew's army was Elites, meaning I could get re-rolls against a wide number of units. It's just a shame I can't take Kill Teams with the CAD, as the re-rolls to wound would make the army even more potent.
As to how my list performed, it was generally pretty good. I think I will play another couple of games before making any changes. I may beef up the Frag Cannon squad, taking 5 models from the Rhino unit and putting them in the Frag Cannon unit. Another change could be putting the combat veterans in the Rhino to make sure they are on the board from the start. I might also switch out the Librarian for a Chaplain to help the combat unit, or leave the second character and add another unit (if possible).
Talking over the game with Andrew afterwards, he said that he had originally turtled his army in the corner for defense and to maximise the effectiveness of his firepower. However, he found that he was tripping over himself a bit. In future games, he would play more aggressively, as well as trying to keep the Commander and Marker Drones alive for longer as they only got one turn of shooting. I think that if he had spread the army out a bit more, it would have forced me to split my units up and the Tau might have been able to deal with them easier.
I was quite fortunate to get three games of 40k played at the various clubs last week. I kept the army the same for all three and will be posting the other two battle reports (hopefully next week). From there, I will take stock in the army and see about making some changes.
Overall, I am enjoying using the Deathwatch army. I am still getting used to them, but they can be very powerful in the right situations.

The Broadsides opened fire on the Rhino in front of them, hitting twice but failing to even glance after some very poor AP rolls. The Stealth Suits fired at the enemy transport, wrecking it after striking its vulnerable rear armour. The two Veteran squads inside deployed, one moving into the cover of the ruins.
The Ghostkeel opened fire on the squad in front of it, killing two of the squad.


On the other flank, the Crisis Suits opened fire on Veteran Squad 1, easily wiping them out with their plasma fire.

The Marker Drones targeted the Bikers in front of them, scoring 6 hits thanks to the drone command of the Tau Commander. The Commander led the Crisis Suits in opening fire on the Veteran squad in the ruins. Despite scoring 7 wounds, only one Veteran fell as their armour held out. The second unit of Stealth Suits fired at the same squad, killing another one of the Veterans.
The final unit of Crisis Suits fired at the Bikers. Utilising the Marker Lights, they denied the unit their Jink save and easily wiped them out.

The Stealth Suits then used their assault moves to claim the objectives, the rest of the army moving away from the Deathwatch.

At the end of his turn, Andrew scored Objective 5 and First Blood.
VICTORY POINTS:
Deathwatch- 2
Tau- 2
That was a brutal first turn. My Frag Cannons had achieved nothing of note and were wiped out in reply. The Tau were able to kill off three of my units and diminish a couple more for no loss in return. This could be a very quick game if things continued in this way!
TURN 2- DEATHWATCH
This turn, I drew Objective 3 and Objective 5 to go with Objective 3 from last turn. I could make use of my Objective Secured units to score objective 3 this turn and would also score 5 if I could take care of the Stealth Suits.

The second Drop Pod carrying Artemis, the Librarian and the combat Veterans arrived, landing right beside the Riptide and Tau Commander. I had decided to go for it, needing to get into combat as soon as possible. The remaining Bikers moved up on the Crisis Suits in front of them, they were the bigger threat than the Crisis Suits. The other Veterans advanced on the Tau positions.


The Riptide fired its Interceptor shots once more. I didn't think Andrew would risk the overcharged shot with my Veterans so close to the Tau lines, but he did. Fortunately for him, the shot did not scatter and he hit the Veterans square, wounding them 7 times. The Storm Shields of the unit bore some of the brunt, but three of the squad still died (two Storm Shields and the Heavy Thunder Hammer).
The Librarian attempted to cast Haemorrhage on the Crisis Team in front of him, but failed to manifest the power. He then cast Smite on the team, wounding one of the suits, before finally using Force on himself.
In the shooting phase, the Veterans in the ruins opened fire on the Stealth Suits with their Infernus Heavy Bolters. The Heavy Flamers succeeded in killing two of the squad.
The newly arrived Veterans fired their shotguns at the Tau Commander's squad, hitting them 10 times with the template attack and killing two of the Drones. The Drop Pods added their firepower, killing another of the Drones.
The Bikers chose to split their fire between the Tau in front of them. One Biker fired at the Stealth Suits, but failed to get past their cover saves. The other Bikers fired at the Crisis suits with their AP3 shells and managed to wipe them out.

The Bikers assaulted the Stealth Suits, easily slaying them with their power weapons and consolidating onto the objective.

The Veterans in the ruins assaulted the other surviving Stealth Suit, also killing him and securing the objective.

The other Veteran unit on the left flank assaulted the Tau Commander and his unit. I need to tie up this unit in combat or they would decimate Artemis and his unit or kill off the Bikers with ease next turn. The squad managed to survive the overwatch fire coming at them and made it into combat. The Veterans struck at the squad, killing one of the Drones. The Drones struck back, killing one of the Veterans. The other Tau struck at the Veterans, but were unable to harm them. The combat was a draw, so I was able to lock the unit in combat.
At the end of my turn, I scored all my objectives for 3 points.
TURN 2- TAU
This turn, Andrew drew Blood and Guts (destroy a unit in the assault phase) to go with Objective 3 and Witchhunter.

The Riptide moved up to engage the Watch Captain's squad, while the Ghostkeel moved to target the Veterans beside the objective. The Broadsides advanced on the field. On the other flank, the Crisis Suits moved away from the Bikers.

The Broadsides opened fire on the Drop Pod. Andrews rolled a double 1 to hit. The weapons were twin-linked, but he managed to roll another double 1 or the re-roll too! The Ghostkeel fired at the Veterans in front of it, killing one of them.


The Crisis Suits fired at the Bikers, wounding them four times, but none of the Jinking Bikers fell.
In the assault phase, the Ghostkeel assaulted the Veterans. The Heavy Flamers wounded the Ghostkeel twice with their overwatch fire, but could not get past their armour. The Hammer of Wrath killed one of the Veterans, the other Veteran striking down a Drone in combat. The Ghostkeel wiped out the rest of the Veterans and consolidated onto the objective.


The Riptide assaulted Artemis' squad. The Watch Captain stepped forward, launching his Stasis Grenade at the Tau construct. The grenade hit and devastated the Riptide, destroying it utterly in a single blow (I rolled a 6 on the Destroyer table and the Riptide was annihilated!).
In the other combat, both sides struck at one another, but neither was able to slay their foe and the combat was drawn.
At the end of his turn, Andrew scored Blood and Guts and Objective 3.
VICTORY POINTS:
Deathwatch- 5
Tau- 4
Things really turned around for me in that turn as I was able to wipe out a number of the Tau units in combat. The real highlight was Artemis taking out the Riptide with his Stasis Grenade, it was the best result for me to get the first time I used it!
TURN 3- DEATHWATCH
This turn, I drew Objective 2, Objective 5 and Objective 6.

Garran Branatar, the lone Terminator, arrived, deep striking beside the Ghostkeel. The Bikers moved to engage the Crisis Team near the woodlands, while the Stalker Boltgun squad continued their advance. Artemis led his unit towards the Tau Commander.


In the psychic phase, the Librarian cast enfeeble on the Crisis Suit Team, then cast force on himself.
The Bikers opened fire on the Tau in front of them, hitting once with their snap shots, but failing to wound (even with their poisoned shells). The nearby Veterans opened fire with their Stalker weapons, killing two of the Drones accompanying the squad.
The Terminator fired at the Ghostkeel, killing one of the Drones with his Heavy Flamer.
In the assault phase, the Bikers assaulted the Crisis Team. They struck at the Tau, killing two of the squad with their Power Swords. The lone Tau struck back, but failed to cause any harm before being finished off with the Power Axe of one of the Veterans.


Artemis led his squad in a charge on the other Crisis Team. The Librarian issued a challenge that the Tau Commander accepted. I didn't have any AP2 weapons and figured the Librarian would be the best bet to kill the Commander with his Force Weapon if he happened to fail a save. The Librarian struck at the Tau warlord, wounding him twice but failing to get past his armour. The Tau Commander struck at the Librarian, also wounding him twice. I failed both my saves and the Librarian was vanquished!
Artemis and the Veterans struck at the Crisis Team, killing the last two Drones and two of the Battlesuits. The Tau killed one of the Deathwatch in reply. The Deathwatch won the combat, but the Tau passed their morale test and kept on fighting.

At the end of my turn, I scored Objective 2 and discarded Objective 6.
TURN 3- TAU
This turn, Andrew drew Objective 5 to go with Objective 3 and Witchhunter.

The Ghostkeel advanced on the Drop Pod, while the Broadsides moved away from the Terminator.

The Broadsides opened fire on Garran, but failed to get past his armour. The Ghostkeel managed to kill him with his Melta shot.
In the combat, Artemis killed the last Crisis Suit. The Veterans struck at the Commander and managed to wound him once. The Commander was able to bring down one of the Veterans, but his morale failed him and he fled from the combat, being cut down as he tried to flee.

At the end of the turn, Andrew scored no points and discarded Witchhunter. I scored Slay the Warlord.
VICTORY POINTS:
Deathwatch- 7
Tau- 4
TURN 4- DEATHWATCH
This turn, I drew Objective 1 and Objective 2 to go with Objective 5 from last turn.

Artemis led the Veterans on the Broadsides, while the Bikers moved to secure the central objective. The Stalker Veterans on the right flank advanced, but a poor terrain roll saw them fall short of the objective. Seeing the threats left on the battlefield, Artemis ordered the Deathwatch to switch to Malleus Mission Tactics.


In the shooting phase, the Bikers fired at the Ghostkeel, wounding it twice. Artemis fired his combi-flamer at the Broadsides, killing one of the Drones. The Shotgun Veterans killed another of the Drones, leaving only the Broadside Battlesuits left.
Artemis led the Veterans in an assault on the Broadsides. The Marines struck at the Tau battlesuits, but were unable to get past their considerable armour. The Broadsides were able to kill one of the Veterans, but the remaining squads held firm.

At the end of my turn, I scored Objective 2 and Objective 5.
TURN 4- TAU
Andrew drew Objective 4 to go with Objective 3 and Objective 5.

The Ghostkeel moved to secure the objective besides the ruins. The Suit opened fire on the Bikers, but failed to harm the jinking Bikers.

In the combat, the Veterans wounded the Broadsides twice but could not get past their armour. The Broadsides killed another Veteran.
At the end of his turn, Andrew scored Objective 3 and discarded Objective 4.
VICTORY POINTS:
Deathwatch- 9
Tau- 5
At this stage, things were looking very good for the Deathwatch. I was ahead on points and there was not much of the Tau army left.
TURN 5- DEATHWATCH
This turn, I drew Supremacy (hold at least 2 objective and twice as many as your opponent) and Objective 6 and had Objective 1 from last turn.

The Bikers moved up on the Ghostkeel, while the Veterans on the right flank continued to advance on the objective.


The Bikers fired at the Ghostkeel, wounding it once more. They then assaulted the Battlesuit, easily killing it with their Power Weapons.

In the combat with the Broadsides, neither side could cause any harm on the other, resulting in a drawn combat.
At the end of my turn, I scored 2 points for Supremacy and scored Objective 1. I discarded Objective 6.
TURN 5- TAU
This turn, Andrew drew Objective 2, Objective 3 and Objective 5.

With the only Tau unit locked in combat, this would be a quick turn. The Deathwatch failed to harm the Broadsides in combat. In reply, the Tau caused two wounds. I failed both saves, losing the last Veteran and taking a wound on Artemis.

Andrew scored no points.
VICTORY POINTS:
Deathwatch- 12
Tau- 5
We rolled to see if the game would end and it continued.
TURN 6- DEATHWATCH
This turn, I drew Objective 1, Kingslayer (kill the enemy warlord) and Domination (control all the objectives).

The Bikers moved up to support Captain Artemis, assaulting the Broadsides. The Veterans struck at the Broadsides, but failed to do any damage, even the Power Axe failed to wound. The combat was drawn.


At the end of my turn, I scored two points for Kingslayer and Objective 1. I discarded Domination.
TURN 6- TAU
Andrew had Objective 2, Objective 3 and Objective 5.

In the combat, the Deathwatch and Tau struck at one another. The Power Axe managed to take a wound off the Broadsides, but they passed their morale test.

At the end of the turn, Andrew scored no points. With that, the game ended.
VICTORY POINTS:
Deathwatch- 16
Tau- 5
A win for the Deathwatch.
AFTER-BATTLE THOUGHTS
Thanks to Andrew for a great game and a great test of my Deathwatch.
I thought I was in serious trouble after the first turn. My Frag Cannons had failed to cause any damage to the Tau army thanks to some poor Drop Pod scatter and poor rolling. I really didn't cause many casualties in the first turn, whereas Andrew took out several important units. I figured the Tau would be a tough match up for my army, but I thought the game was going to be over very quickly.
As it was, once I started to get into combat with them, they folded pretty quickly (as you would expect for Tau). The Bikers with their Power Weapons were great for taking on the Battlesuits, able to ignore their armour. They also get twin-linked Bolters with special ammunition, making the AP3 shells very potent to take out the Tau.
Also, I could not have asked for a better result when using Artemis' Stasis Grenade for the first time. Taking out the Riptide in a single attack was amazing. If not for that, I think I would have struggled to kill it and it would have either slowly wiped me out in combat or tied me up for the rest of the game.
I am also coming to appreciate the Mission Tactics more and more. Getting army wide re-rolls against certain units is a great bonus. It also helped that most of Andrew's army was Elites, meaning I could get re-rolls against a wide number of units. It's just a shame I can't take Kill Teams with the CAD, as the re-rolls to wound would make the army even more potent.
As to how my list performed, it was generally pretty good. I think I will play another couple of games before making any changes. I may beef up the Frag Cannon squad, taking 5 models from the Rhino unit and putting them in the Frag Cannon unit. Another change could be putting the combat veterans in the Rhino to make sure they are on the board from the start. I might also switch out the Librarian for a Chaplain to help the combat unit, or leave the second character and add another unit (if possible).
Talking over the game with Andrew afterwards, he said that he had originally turtled his army in the corner for defense and to maximise the effectiveness of his firepower. However, he found that he was tripping over himself a bit. In future games, he would play more aggressively, as well as trying to keep the Commander and Marker Drones alive for longer as they only got one turn of shooting. I think that if he had spread the army out a bit more, it would have forced me to split my units up and the Tau might have been able to deal with them easier.
I was quite fortunate to get three games of 40k played at the various clubs last week. I kept the army the same for all three and will be posting the other two battle reports (hopefully next week). From there, I will take stock in the army and see about making some changes.
Overall, I am enjoying using the Deathwatch army. I am still getting used to them, but they can be very powerful in the right situations.
Yet again mate, another game where you manage to wrest control back after a wobbly start!
ReplyDeleteI did notice a couple of little things though - it doesn't appear to have affected things but on Turn 2 you said your librarian tried to cast haemorrage, smite, and force, but the FAQ confirms he can only cast 2 powers now.
Then later, your opponent discarded the witch hunter card, despite having killed your librarian. I'll confess I don't know the text off the card but I'd have thought it would allow him to score that - seems a bit weird to deny the point for killing the psyker just because you did it in your opponent's turn!
Other than that, I think you turned things around nicely. As you said, clustering all the Tau units together wouldn't have helped them much, as it meant that once you had reached their lines it was just a matter of time before they all got taken down in combat. Targeting your bikes early with plasma and markerlights would have limited your mobility and made things much more difficult for you.
Yeah, I was really surprised about the outcome in the end!
DeleteYou are right about the Librarian. It's one of those rulings that I keep forgetting about, will try to find out in the future.
I agree with your point on the maelstrom card, but the wording on the card is you have to kill the psyker in your turn. I think that only Kingslayer gives the points for killing the warlord at any point, even if it already happened before you drew the card. I think that you should be able to score cards from your opponent's turn at the end of your own turn. You would still score the point, but wouldn't get to draw additional cards in your own turn.
I was surprised that the three Veterans were able to tie up the Commander for a couple of rounds of combat and prevent the use of the Markerlights. Had the Commander had a Power sword, the Veterans would have died in the first round of combat. Even though Tau are generally terrible in combat, the Commander does ok against Marines.
Great game and batrep. I'm not sure what the meta is in your area but that is a pretty weak tau list. Over here you wouldn't see any less than at least 3 riptides in a riptide wing. In fact I'm playing a game next week against a list with 5 riptides and a storm surge...
ReplyDeleteAndrew was just getting back into 40k with his Tau, so it was not the most hardcore of tournament lists. The meta in most of the groups around here tends towards casual and semi-competitive (at least the games that I have played).
DeleteI have played a 6 Riptide list before, it is not that much fun, but is no doubt very powerful!
Great game.
ReplyDeletenice game, those faqs are a nightmare to keep track of
ReplyDeleteCheers Markus!
Delete